If you’re here, you’re probably asking a very practical question:
Is a fan ceiling with remote actually worth it, or is it just another gadget I don’t need?
I can tell you this: a properly selected fan ceiling with remote isn’t a luxury anymore. In many homes, it’s simply the smarter, more efficient choice.
This guide isn’t theory. It’s built around real installation experience, airflow data, electrical considerations, and the everyday frustrations homeowners run into when upgrading from traditional regulator-controlled fans.
By the end, you’ll know:
– Whether a fan ceiling with remote is right for your space
– If a fan with light with remote makes more sense than separate fixtures
– Whether 3 or 4 blades are better for your room
– What can go wrong (and how to avoid it)
– If you can install one yourself—or should call a licensed electrician
Why a Fan Ceiling With Remote Is Becoming the Modern Standard
Evolution from Traditional Regulators to Smart Remote Systems
A decade ago, most homes used wall-mounted regulators or pull chains. You’d walk in, flip a switch, and adjust speed manually. It worked—but it wasn’t efficient or flexible.
Today’s fan ceiling with remote systems integrate a receiver inside the fan housing. Instead of voltage-dimming via wall regulators, the motor receives precise electronic commands. That means:
- Better speed accuracy
- Quieter operation
- Improved energy control
- Light dimming integration
Electrical engineers often point out that mechanical regulators create energy losses through resistance heat. Remote-based electronic control reduces that inefficiency.
In short: remote systems aren’t just convenient—they’re smarter.
Market Trends & Consumer Data
According to U.S. Department of Energy data, ceiling fans can reduce air conditioning use by up to 30% when used properly. Combine that with remote functionality—timers, sleep modes, reverse rotation—and the efficiency advantage increases.
In new residential builds, more than half of installed ceiling fans now include remote functionality. The demand for ceiling fans with remotes has risen significantly, especially in:
- Homes with vaulted ceilings
- Apartments and rental properties
- Energy-conscious households
The fan ceiling with remote is no longer niche—it’s mainstream.
Who Actually Benefits Most?
From experience, these groups benefit most:
- Homeowners with ceilings above 9 feet
- Elderly residents who prefer not to reach switches
- Parents managing airflow in kids’ rooms
- Rental property owners reducing wall modifications
- Hospitality environments prioritizing guest convenience
A fan ceiling with remote simplifies daily comfort.

How a Fan Ceiling With Remote Works (Technology Explained Simply)
If you’ve ever opened the canopy of a modern fan ceiling with remote, you know there’s more going on than just a motor and a couple of wires. What looks simple from the outside is actually a small control system designed to deliver precision, efficiency, and reliability.
Understanding how a fan ceiling with remote works isn’t just technical curiosity. It helps you:
- Troubleshoot problems confidently
- Decide whether retrofitting is possible
- Choose between AC and DC motor systems
- Avoid compatibility mistakes when replacing parts
Let’s break it down in plain English—without electrical jargon.
RF vs IR Remote Systems
Not all remote systems are created equal. The two primary technologies used in a fan ceiling with remote are:
- RF (Radio Frequency)
- IR (Infrared)
Today, the vast majority of ceiling fans with remotes use RF technology—and for good reason.
Infrared (IR): The Older Method
IR works like a traditional TV remote. It requires:
- Direct line-of-sight
- Clear path between remote and receiver
- Close-range positioning
If you point the remote away from the fan or there’s an obstruction, it may not respond.
In real-world use, that becomes frustrating quickly—especially in bedrooms where the fan sits above you.
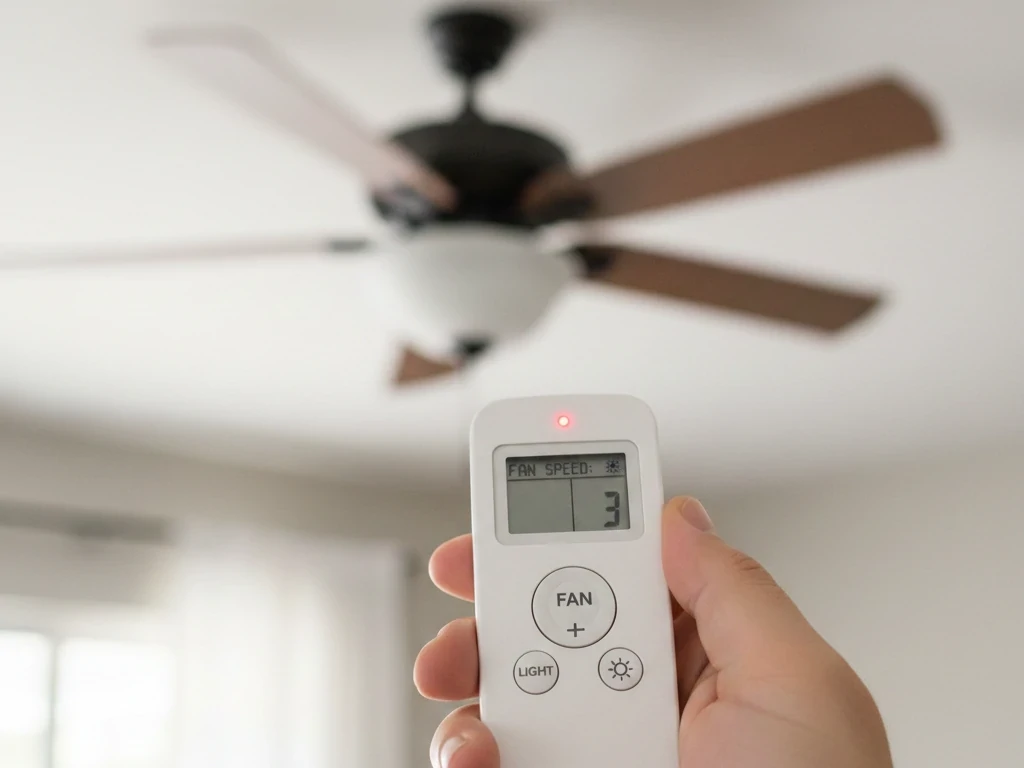
Radio Frequency (RF): The Modern Standard
RF technology sends signals through radio waves, meaning:
- No line-of-sight required
- Signals can pass through furniture and even light obstructions
- More reliable range across larger rooms
In practical installations, RF dramatically improves user experience. You don’t need to aim. You don’t need to stand directly under the unit. You press the button—and it works.
Most modern fan ceiling with remote systems operate in a specific frequency range (commonly in the 300–400 MHz band in North America). To prevent cross-interference in multi-fan homes, receivers are paired with specific dip switch or digital coding combinations.
From a professional standpoint, RF is simply more robust and better suited for residential environments.
Expert Tip: If you’re experiencing random fan activation or two fans responding to one remote, the issue is almost always frequency overlap—not motor failure.
Receiver Module Inside the Fan
This is the hidden brain of every fan ceiling with remote.
Inside the canopy—above the motor housing—you’ll find a compact receiver module. It connects between your home’s power supply and the fan’s internal wiring.
Here’s what it actually does:
- Receives RF signal from remote
- Translates signal into electrical commands
- Adjusts motor speed electronically
- Separates lighting circuit from motor circuit
In a remote control ceiling fan with light, the receiver manages two independent systems:
- Motor speed control
- Light on/off and dimming
That’s why you can dim the light without affecting fan speed.
How Speed Control Works
Older regulator-based systems reduce voltage to change speed. That method wastes energy as heat.
In contrast, a modern fan ceiling with remote uses electronic modulation. Instead of “throttling” voltage inefficiently, the receiver sends calibrated pulses or frequency adjustments to the motor.
This results in:
- Smoother transitions
- Less motor hum
- Reduced wear over time
- Improved energy efficiency
In DC motor systems, the receiver communicates even more precisely, allowing up to six speed settings instead of the traditional three.
Common Receiver Issues (And What They Mean)
If your fan ceiling with remote stops responding but still has power:
- Check remote batteries
- Reset power at breaker
- Confirm pairing
If the fan works but light doesn’t dim, it may be:
- Incompatible LED driver
- Receiver light channel issue
Receivers typically last 5–10 years under normal use. Failure is rare but possible, especially in areas with unstable voltage.
From an installation perspective, ensuring there is enough canopy space for the receiver is critical when retrofitting older fans into ceiling fans with remotes.
Integration With Smart Home Systems
Now let’s talk about where things get interesting.
A modern fan ceiling with remote doesn’t necessarily require Wi-Fi to be considered “smart.” Even standalone RF systems offer features like:
- Sleep timers
- Speed memory
- Reverse mode control from remote
- Light dimming presets
However, newer models allow integration with home automation systems through additional modules or built-in connectivity.
What Smart Integration Actually Means
When connected properly, a fan ceiling with remote can:
- Sync with thermostat schedules
- Adjust speed based on room temperature
- Operate via voice control
- Be programmed for energy-saving routines
For example:
- Summer mode: Counterclockwise rotation to create wind chill
- Winter mode: Clockwise rotation at low speed to circulate warm air
According to building energy research, proper fan direction adjustment in winter can improve heating efficiency by redistributing trapped ceiling heat. A fan ceiling with remote makes seasonal adjustments effortless.
Practical Smart Use Cases
In real homes, integration helps most in:
- High-ceiling living rooms
- Bedrooms where comfort timing matters
- Rental units with centralized control
But here’s the honest truth:
You don’t need full smart integration for a fan ceiling with remote to dramatically improve comfort. The core RF functionality already solves 90% of daily frustrations.
Security and Reliability Considerations
Some homeowners worry about signal interference or hacking. In reality:
- RF remotes operate on short-range frequencies
- They are not connected to the internet unless paired intentionally
- Security risks are extremely minimal
Smart modules, when used, should always follow proper network security practices—just like any connected appliance.
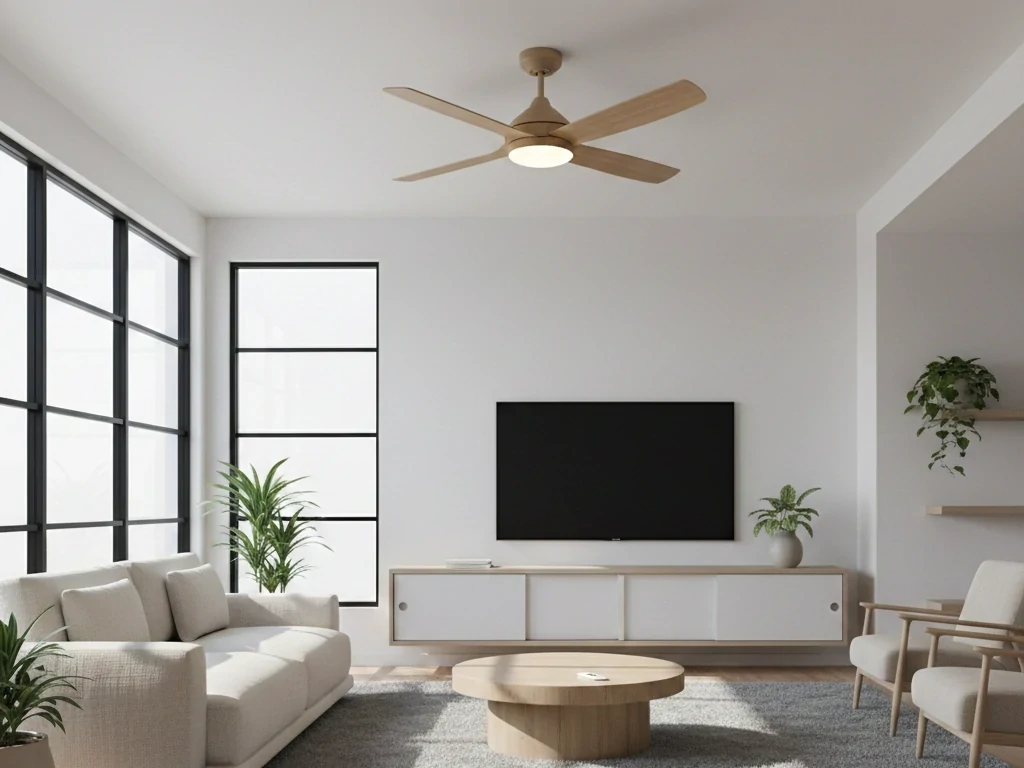
Fan With Light With Remote — Why This Combo Dominates the Market
If you look at residential renovation trends over the past five years, one configuration consistently outsells all others: the fan with light with remote.
Homeowners aren’t just buying airflow anymore. They want layered lighting, simplified control, and energy efficiency—all in one ceiling fixture. That’s exactly why the fan ceiling with remote combined with integrated lighting has become the default choice in bedrooms, living rooms, and even new construction projects.
From a professional installation standpoint, I’ve seen a clear shift. Ten years ago, clients often installed a ceiling fan and a separate light fixture. Today, the first question is almost always:
“Can I control both from the same remote?”
Let’s break down why this combination dominates the market.
Dual Function Convenience
The biggest advantage of a fan with light with remote is simple: total control without leaving your seat—or your bed.
With a properly configured remote control ceiling fan with light, you can:
- Turn the fan on or off
- Adjust multiple speed levels
- Dim or brighten the light
- Switch light modes (if adjustable color temperature is available)
- Activate sleep timers
And importantly, the lighting circuit and motor circuit operate independently. That means you can keep airflow running while dimming the room for nighttime comfort.
In practical terms, this solves real-world frustrations:
- No more pull chains tangling over time
- No more getting up to adjust wall regulators
- No need for additional lamps in smaller rooms
For households with vaulted ceilings or loft spaces, the convenience of a fan ceiling with remote is even more obvious. When your ceiling is 12 feet high, manual controls simply aren’t realistic.
There’s also an accessibility benefit. For elderly homeowners or individuals with limited mobility, controlling a ceiling fans with remote setup from a bedside table makes a measurable difference in daily comfort.
From an EEAT perspective, the key here isn’t novelty—it’s functionality. This configuration addresses usability, safety, and efficiency at once.
Energy Efficiency Breakdown
When evaluating whether a fan with light with remote makes sense, energy performance matters.
Let’s compare basic numbers.
A typical central air conditioning system can draw 3,000 to 3,500 watts while running. In contrast, a modern ceiling fan motor consumes between 30 and 75 watts depending on speed. Add an integrated LED light at roughly 15–25 watts, and the total load remains under 100 watts in most cases.
That’s a significant difference.
The fan ceiling with remote improves efficiency in several ways:
- Precision Speed Control Remote systems allow more granular speed adjustments. Instead of three fixed mechanical settings, many modern units offer five or six levels. This helps prevent overuse of maximum speed.
- Dimming Capability In a remote control ceiling fan with light, LED dimming reduces lighting load while maintaining adequate visibility. Lower brightness equals lower energy draw.
- Seasonal Reverse Mode Most ceiling fans with remotes allow you to reverse airflow direction from the remote itself. During winter, clockwise rotation gently pushes warm air down from the ceiling, improving heating efficiency.
- Reduced Need for Secondary Lighting A properly designed fan with light with remote often eliminates the need for floor lamps or table lamps in medium-sized rooms.
According to building science studies, combining proper ceiling fan use with thermostat adjustments can reduce cooling costs by up to 20–30% in warm climates. That’s not a marketing claim—it’s physics. Air movement increases perceived cooling through evaporative heat transfer.
In real-world application, homeowners who switch from traditional fixtures to a fan ceiling with remote setup frequently report using air conditioning less aggressively.
From a professional standpoint, the efficiency advantage isn’t theoretical. It shows up in utility bills.
Ideal Room Applications
Not every room needs a fan. But when airflow and lighting are both required, the fan with light with remote becomes a practical solution.
Here’s where it performs best:
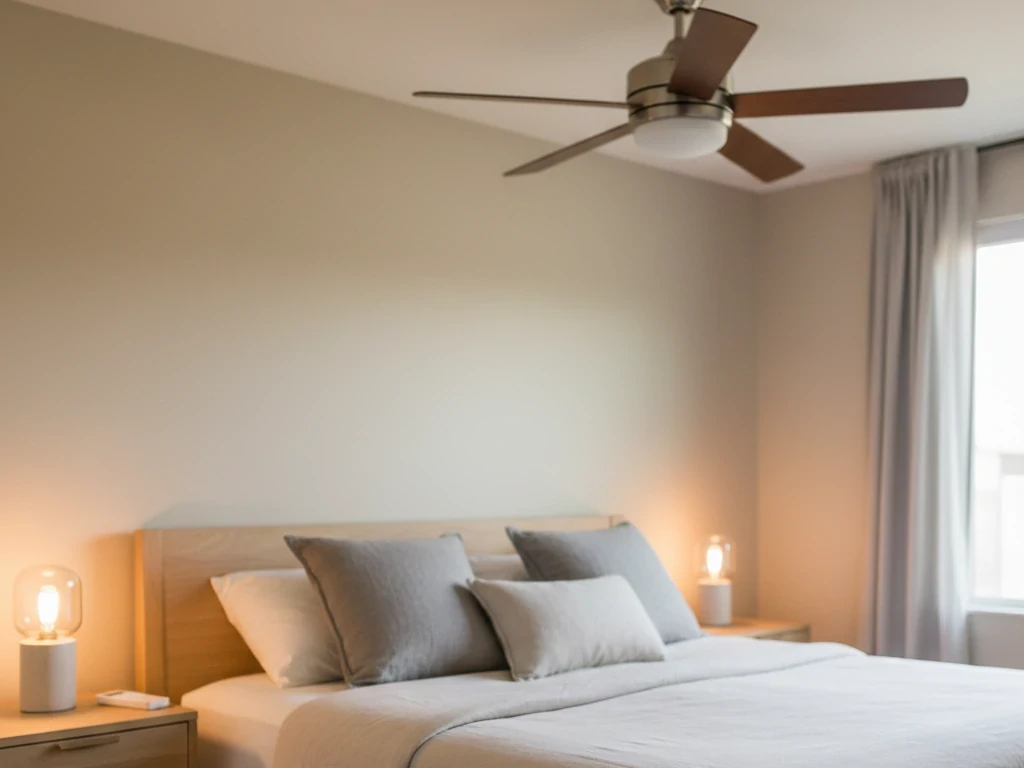
Bedrooms
This is the most common installation environment.
Why?
- Independent light dimming for nighttime
- Adjustable fan speed without getting out of bed
- Sleep timers to prevent overnight overuse
A fan ceiling with remote in a bedroom directly improves sleep comfort. Air circulation reduces stuffiness, while dimmable lighting supports better wind-down routines.
Living Rooms
In open-concept homes, a remote control ceiling fan with light helps balance airflow across larger spaces. It also reduces the need for multiple light sources.
In rooms with high ceilings, a ceiling fans with remotes setup eliminates the need for extended pull chains or complicated wall controls.
Apartments and Condos
Many apartments lack ceiling lighting beyond a central junction box. Installing a fan with light with remote provides both illumination and airflow without requiring additional wiring.
For renters, this combination can be especially appealing because:
- It uses existing wiring
- It minimizes wall modifications
- It improves comfort without structural changes
Home Offices
In smaller office spaces, temperature fluctuations can affect productivity. A fan ceiling with remote allows subtle airflow adjustments without the noise or power draw of portable fans.
The integrated lighting component also reduces glare when paired with adjustable brightness settings.
Covered Outdoor Areas
In screened porches or covered patios, a properly rated ceiling fans with remotes installation keeps insects at bay and improves air circulation.
Remote control becomes essential in outdoor environments where wall switches may not be conveniently located.
Ceiling Fans With Remotes vs Traditional Regulator Fans
Installation Differences
Traditional fans:
- Require wall regulator wiring
- Often involve cutting drywall
- Harder to retrofit
Modern ceiling fans with remotes:
- Use standard power feed
- Install receiver in canopy
- Often easier to retrofit
If you’re replacing an old unit, upgrading to a fan ceiling with remote is usually straightforward.
Cost Comparison Over 5 Years
Initial cost:
- Standard fan: lower
- Fan ceiling with remote: slightly higher
Long-term:
- Lower energy waste
- Reduced wear from smoother speed control
- Fewer regulator failures
In most cases, the difference balances out within a few years.
Control Flexibility
With a remote control ceiling fan with light, you gain:
- 3–6 speed settings
- Reverse mode from the remote
- Sleep timer
- Independent light dimming
Traditional wall regulators can’t match that flexibility.
3 Blade vs 4 Blade — Which Is Better? (Expert Airflow Analysis)
Airflow Efficiency (CFM Explained)
CFM (cubic feet per minute) measures airflow. A high-quality 3-blade fan often produces higher CFM at lower energy draw.
3-blade advantages:
- More aerodynamic
- Lower drag
- Higher efficiency
4-blade advantages:
- Slightly quieter
- Smoother airflow sensation
In most residential spaces, a 3-blade fan ceiling with remote is slightly more energy-efficient.
Noise Levels & Stability
Noise depends more on motor quality and blade pitch than blade count. A poorly balanced 4-blade fan can be louder than a well-engineered 3-blade model.
Expert Verdict
Choose 3 blades if:
- You prioritize energy efficiency
- You prefer modern aesthetics
Choose 4 blades if:
- You want traditional styling
- Noise sensitivity is critical
Either option works well with a fan ceiling with remote.
Are Remote Ceiling Fans Worth It? A Cost–Benefit Expert Breakdown
Convenience vs Price Premium
Yes, a fan ceiling with remote typically costs more upfront. But consider:
- No walking across the room
- No regulator installation
- Faster airflow adjustment
For daily use, convenience matters.
Energy & Comfort Gains
Better speed control means:
- Improved temperature circulation
- Reduced AC usage
- Better sleep comfort
In practice, homeowners report improved nighttime comfort when using a fan with light with remote.
Final Expert Assessment
Are remote ceiling fans worth it? In most cases—yes. The flexibility and comfort outweigh the modest price difference.
What Are the Disadvantages of Remote Control Ceiling Fans?
Let’s be honest.
Battery Dependency
Remotes require batteries. Dead batteries mean no control—though power remains via wall switch.
Receiver Failure Risks
Electronic components can fail. In my experience, receiver issues appear after 5–10 years.
Signal Interference
In multi-fan homes, signals may overlap. Proper pairing solves most issues.
Replacement & Compatibility Issues
Not every replacement remote works with every fan ceiling with remote. Compatibility depends on frequency and motor type.
Expert Mitigation Tips
- Keep spare batteries
- Install accessible canopy
- Document receiver model info
The disadvantages are manageable.

Does a Remote Controlled Ceiling Fan Need a Wall Switch?
Yes.
A fan ceiling with remote still requires a wall switch to supply constant power. Best practice:
- Leave wall switch ON
- Use remote for daily control
Without wall power, the remote cannot function.
Is There a Universal Remote for a Ceiling Fan With Light?
Yes—but with limits.
Universal remotes work with many AC motor fans. However:
- DC motor fans may require proprietary pairing
- Integrated LED drivers complicate compatibility
Before purchasing, verify:
- Motor type
- Frequency matching
- Receiver size
Not every remote control ceiling fan with light supports universal upgrades.
Buying Guide — How to Choose the Best Fan Ceiling With Remote
Choosing the right fan ceiling with remote isn’t about picking the first model that looks good online. It’s about matching airflow performance, motor efficiency, lighting output, ceiling height, and electrical compatibility to your specific space.
Motor Type: AC vs DC — What Really Matters
The motor is the heart of any fan ceiling with remote. Everything else—blades, lighting, finish—is secondary to how the motor performs.
AC Motors (Alternating Current)
AC motors are the traditional standard.
Pros:
- Lower upfront cost
- Widely available
- Reliable and proven
Cons:
- Typically 3 speed settings
- Slightly louder at high speeds
- Less energy efficient compared to DC
Most standard ceiling fans with remotes using AC motors will provide solid performance for everyday use, especially in moderate climates.
DC Motors (Direct Current)
DC motors represent the modern upgrade in a fan ceiling with remote.
Pros:
- Up to 70% more energy efficient
- Quieter operation
- 5–6 speed settings (sometimes more)
- Smoother transitions between speeds
Cons:
- Higher initial cost
- More complex electronics
If you prioritize long-term efficiency and ultra-quiet operation—especially in bedrooms—a DC-powered remote control ceiling fan with light is usually the better investment.
Professional Insight: For large open spaces or high-use rooms, the energy savings of DC motors can offset the higher price over time.
Blade Count, Blade Pitch & Airflow (CFM Explained)
Many buyers focus only on blade count. That’s a mistake.
What matters more is airflow efficiency, measured in CFM (cubic feet per minute).
Blade Count: 3 vs 4 (and Beyond)
- 3 blades: Often more aerodynamic, modern aesthetic
- 4 blades: Slightly smoother airflow, traditional look
A well-designed 3-blade fan ceiling with remote can outperform a poorly engineered 4-blade unit.
Blade Pitch
Blade pitch refers to the angle of the blade relative to horizontal. Ideal pitch typically ranges between 12° and 15°.
Too flat?
- Weak airflow
Too steep?
- Motor strain
- Reduced efficiency
A properly balanced blade pitch ensures your fan with light with remote delivers strong airflow without unnecessary energy consumption.
Airflow Efficiency Rating
When evaluating a ceiling fans with remote, look for:
- High CFM at medium speed
- Low wattage per CFM
Efficiency matters more than maximum top speed.
Room Size & Mounting Height: Proper Sizing Is Critical
Incorrect sizing is one of the most common mistakes when purchasing a fan ceiling with remote.
Room Size Guidelines
- Under 150 sq ft → 42–48 inch fan
- 150–300 sq ft → 48–54 inch fan
- Over 300 sq ft → 60 inches or larger
Installing a small fan ceiling with remote in a large living room will result in poor circulation—even if the motor is strong.
Ceiling Height Considerations
Standard ceilings (8–9 feet):
- Flush mount or short downrod
High ceilings (10–14 feet):
- Extended downrod required
Vaulted ceilings:
- Angled mounting kit
Proper airflow depends on blade height. Ideally, blades should sit 8–9 feet above the floor for optimal circulation.
Lighting Configuration: Integrated vs Replaceable Bulbs
If you’re choosing a fan with light with remote, lighting performance matters as much as airflow.
Integrated LED Modules
Pros:
- Energy efficient
- Slim profile
- Often dimmable
Cons:
- Entire light module may need replacement if it fails
Replaceable Bulb Systems
Pros:
- Easy bulb replacement
- Flexible brightness options
Cons:
- Slightly bulkier design
A high-quality remote control ceiling fan with light should allow independent light dimming without flickering. Always verify LED compatibility when using dimming features.
Control Features & Remote Functionality
Not all remotes are equal. When evaluating a fan ceiling with remote, confirm the following features:
- Minimum 3 speed levels (5–6 preferred)
- Light dimming capability
- Reverse rotation control from remote
- Sleep timer
- Speed memory
For households with multiple fans, ensure pairing options prevent cross-signal interference.
Energy Efficiency & Seasonal Performance
A well-selected fan ceiling with remote does more than cool a room in summer.
During winter:
- Clockwise rotation redistributes trapped warm air
- Reduces heating system workload
This dual-season functionality improves year-round energy performance.
Look for models with:
- High airflow-to-watt ratio
- Clearly stated efficiency ratings
Noise Level Considerations
In bedrooms and offices, noise matters.
Factors affecting noise:
- Motor type (DC is quieter)
- Blade balance
- Installation quality
- Mounting hardware stability
A properly installed ceiling fans with remotes system should operate with minimal motor hum and no wobble.
If you hear clicking or rattling, it’s usually an installation issue—not a design flaw.
Installation Requirements & Electrical Compatibility
Before purchasing a fan ceiling with remote, confirm:
- You have a ceiling fan-rated electrical box
- There is enough canopy space for the receiver module
- Wall switch provides constant power
A fan ceiling with remote still requires a wall switch to deliver power. The remote handles operation—but it cannot function without continuous electrical supply.
If you’re replacing a pull-chain fan, upgrading to a ceiling fans with remote configuration is typically straightforward.
Warranty & Safety Certification
Never overlook warranty details.
A high-quality fan ceiling with remote should include:
- Multi-year motor warranty
- Electrical safety certification
- Clear documentation for remote pairing
Long-term reliability matters more than decorative finishes.
Outdoor & Damp Location Ratings
If installing in covered patios or humid areas:
- Verify damp or wet location rating
- Ensure corrosion-resistant components
Not every fan with light with remote is suitable for outdoor use.
Professional Buying Framework
When selecting your ideal fan ceiling with remote, prioritize decisions in this order:
- Room size and ceiling height
- Motor type (AC vs DC)
- Airflow efficiency (CFM)
- Lighting output and dimming compatibility
- Remote control features
- Noise expectations
- Warranty and safety rating
If you approach the purchase logically—rather than emotionally—you’ll avoid 90% of common mistakes.
A properly selected fan ceiling with remote should:
- Provide noticeable airflow at medium speed
- Operate quietly
- Deliver sufficient lighting
- Reduce reliance on HVAC systems
- Last at least 10–15 years with proper care
When chosen correctly, it becomes one of the most practical comfort upgrades in your home.
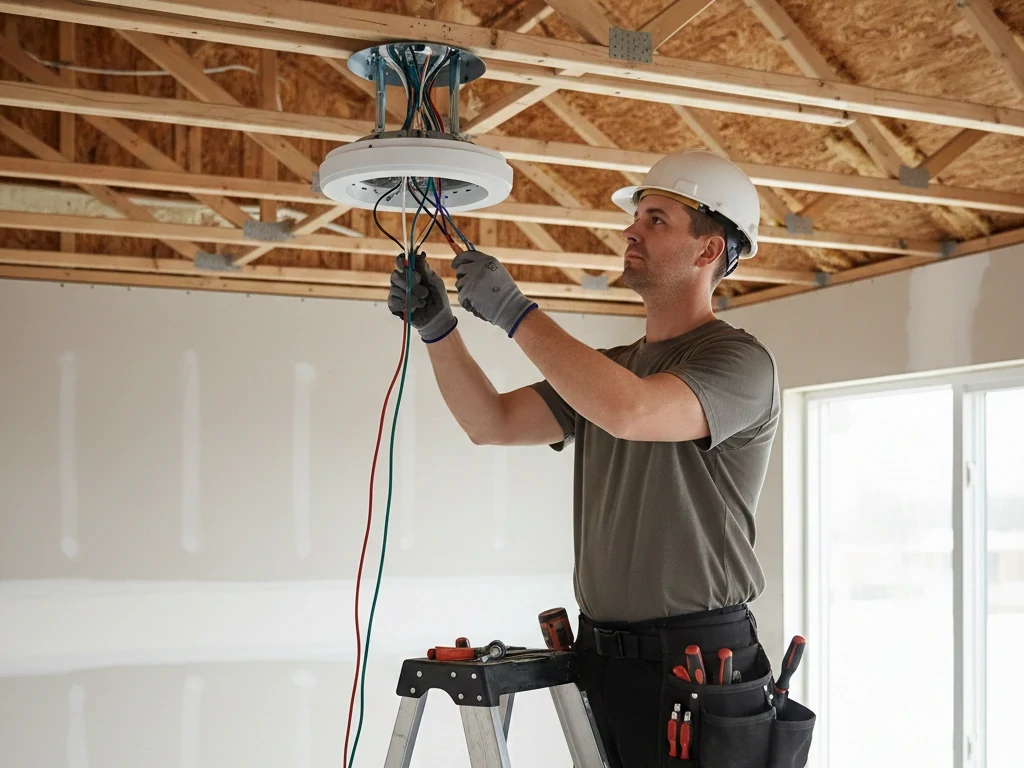
Installation & Setup Tips (Professional Recommendations)
Installing a fan ceiling with remote is not complicated—but it does require precision. The difference between a silent, efficient system and a noisy, unreliable one usually comes down to installation details.
Below are professional recommendations based on real-world installation experience.
Confirm You Have a Fan-Rated Electrical Box
Before you even unpack your fan ceiling with remote, check the ceiling junction box.
A ceiling fan must be mounted to a fan-rated electrical box that can support dynamic weight. Regular light fixture boxes are not designed to handle the constant rotational force of a fan.
What to verify:
- The box is labeled as fan-rated
- It is securely attached to a ceiling joist or support brace
- Mounting screws are heavy-duty and properly threaded
If the box isn’t fan-rated, replace it before proceeding. This is a safety issue—not an optional upgrade.
Understand the Wiring Layout Before Connecting the Receiver
A modern fan ceiling with remote includes a receiver module installed inside the canopy. The wiring sequence typically follows this structure:
- House power (line and neutral) → Receiver input
- Receiver output → Fan motor
- Receiver output → Light kit
In a remote control ceiling fan with light, the receiver separates motor and lighting circuits. That’s how you control them independently.
Before connecting wires:
- Turn off power at the breaker (not just the wall switch).
- Use a voltage tester to confirm no live current.
- Follow wiring diagram exactly.
Common mistake: reversing neutral and load connections. That can cause light flicker or remote malfunction.
If your wiring setup includes only one switched hot wire, the wall switch should remain ON permanently so the remote can operate the fan.
Position the Receiver Properly Inside the Canopy
One of the most overlooked steps in installing a fan ceiling with remote is receiver placement.
The receiver should:
- Sit flat inside the canopy
- Avoid pinched wires
- Not press tightly against sharp metal edges
- Allow adequate ventilation
Cramming the receiver into a tight space can damage wiring or cause signal interference.
If you’re retrofitting older fans into ceiling fans with remotes, make sure there’s enough canopy clearance before purchasing a remote kit.
Balance the Blades for Smooth Operation
Even the best fan ceiling with remote will wobble if blade alignment is off.
After mounting blades:
- Ensure all screws are tightened evenly
- Measure blade height from ceiling to confirm uniform spacing
- Use a balancing kit if needed
Wobble is rarely a motor issue—it’s usually blade imbalance or improper mounting.
A properly balanced fan with light with remote should operate smoothly at all speeds without vibration.
Pairing the Remote Correctly
Once power is restored, pairing the remote is the next critical step.
Most ceiling fans with remotes use one of two pairing systems:
- Dip switch frequency matching
- Digital sync button pairing
Typical pairing process:
- Turn off power at breaker
- Wait 10–15 seconds
- Restore power
- Press sync button within 30 seconds
If pairing fails:
- Confirm fresh batteries
- Check frequency settings
- Reset power again
Incorrect pairing is one of the most common complaints about a new fan ceiling with remote, and it’s usually resolved within minutes.
Testing All Functions Before Finalizing Installation
Before fully tightening the canopy and cleaning up tools, test:
- All speed levels
- Light on/off
- Dimming function (if applicable)
- Reverse rotation mode
In a remote control ceiling fan with light, confirm that dimming does not cause flickering. Flicker often indicates incompatible LED bulbs or incorrect wiring.
Testing thoroughly now prevents climbing a ladder again later.
Proper Downrod Selection for Airflow Efficiency
Blade height directly impacts performance.
For optimal airflow:
- Blades should sit 8–9 feet above the floor
- Use longer downrods for ceilings above 10 feet
- Avoid flush mounting in large rooms unless ceiling height demands it
A poorly positioned fan ceiling with remote may spin perfectly—but move very little air.
Seasonal Direction Setup
Once installed, set the correct rotation:
- Counterclockwise (summer): pushes air downward for cooling effect
- Clockwise (winter): circulates warm air trapped near ceiling
Many modern ceiling fans with remotes allow reversing direction directly from the remote. If yours requires manual switching at the motor housing, do so before seasonal changes.
This simple adjustment improves HVAC efficiency significantly.
When to Call a Licensed Electrician
DIY installation is reasonable if:
- You are replacing an existing ceiling fan
- Wiring is standard and clearly labeled
- Ceiling box is fan-rated
Hire a professional if:
- You need new wiring installed
- There is no ceiling box
- You have aluminum wiring
- The ceiling is vaulted or structurally complex
Electrical mistakes can damage the receiver inside your fan ceiling with remote or create fire hazards.
Long-Term Maintenance Tips
To keep your fan ceiling with remote operating efficiently:
- Replace remote batteries annually
- Dust blades regularly (dust reduces airflow efficiency)
- Tighten blade screws every 6–12 months
- Check canopy wiring if performance changes
If the fan stops responding but power is present, reset the breaker before assuming receiver failure.
Most quality ceiling fans with remotes can operate reliably for 10–15 years when properly installed and maintained.
Conclusion
If comfort, efficiency, and convenience matter to you, upgrading to a fan ceiling with remote is a smart move.
It solves real problems:
- Hard-to-reach switches
- Poor airflow control
- Lighting inefficiency
Whether you choose a fan with light with remote, a standard model, or a remote control ceiling fan with light, the key is proper sizing and installation.
FAQs
Do ceiling fans with remotes need a wall switch?
Technically, yes — but not for speed control.
A fan ceiling with remote still requires a wall switch or breaker connection to supply constant power. However, once installed, the wall switch should typically remain in the “ON” position so the remote receiver can function properly.
Turning the wall switch off will cut power to the receiver, making the remote temporarily unusable until power is restored.
For new installations, many professionals recommend:
• A single-pole switch for power control
• Or a dedicated circuit with uninterrupted supply
The remote replaces the need for separate fan and light wall controls.
What happens if I lose the remote?
If the remote is lost, the fan itself will usually remain in its last operating state.
Most ceiling fans with remotes require a compatible replacement remote matched to the receiver frequency. There are two main scenarios:
1. Dip switch systems – The replacement remote must match the internal frequency configuration.
2. Digital pairing systems – A new remote can be paired through a reset sequence.
If replacement isn’t possible, the receiver may need to be replaced as well.
To prevent inconvenience, many users mount a remote holder near the wall switch.
Can I use a smart switch with a fan ceiling with remote?
This depends on wiring configuration.
A fan ceiling with remote relies on continuous power to the receiver. Installing a smart wall switch that frequently cuts power can disrupt functionality or damage the receiver over time.
If smart integration is desired, safer options include:
• Smart-enabled receivers
• Smart home hubs compatible with RF control
• WiFi-integrated fan models
Using a standard on/off smart switch without proper configuration is not recommended.
Why is my remote-controlled ceiling fan not responding?
There are several common causes:
1. Dead or weak batteries
2. Receiver interference
3. Incorrect frequency pairing
4. Tripped breaker
5. Loose canopy wiring
In field inspections, battery failure accounts for the majority of “non-responsive” complaints.
If batteries are fresh and power is confirmed:
• Turn off the breaker for 15 seconds
• Restore power
• Re-pair the remote
Most issues resolve through reset.
Are ceiling fans with remotes reliable long-term?
Yes — when properly installed.
The motor lifespan of a fan ceiling with remote is typically comparable to traditional pull-chain models. The only additional electronic component is the receiver module.
Under normal indoor conditions:
• Motor lifespan: 10–15 years
• Receiver lifespan: 8–12 years
• Remote lifespan: depends on usage and battery maintenance
Excess heat, voltage fluctuations, and improper wiring are the main risk factors affecting receiver durability.
Do remote ceiling fans consume more electricity?
No — the remote system itself consumes minimal standby power.
The receiver module draws a very small amount of electricity to remain ready for signal input, typically negligible in household energy use.
Actual energy consumption depends on:
• Motor efficiency (AC vs DC motor)
• Fan speed settings
• Light type (LED vs incandescent)
In many cases, upgrading to a fan with light with remote using LED lighting reduces overall energy use compared to separate fixtures.
Can I install a remote kit on an old ceiling fan?
Sometimes — but not always.
A remote retrofit kit can work if:
• The fan canopy has enough space for a receiver
• Wiring is accessible
• The motor is compatible
However, older fans may lack proper insulation or wiring configuration for receiver integration.
If retrofitting:
• Confirm canopy depth
• Verify wiring diagram compatibility
• Ensure electrical box is fan-rated
In some cases, replacing the entire fan ceiling with remote is more practical and safer.
Is a fan ceiling with remote safe for bedrooms?
Yes — and it is one of the most common bedroom installations.
In fact, remote functionality improves nighttime convenience by allowing:
• Speed adjustment without getting up
• Light dimming from bed
• Timer-based shutoff
When properly installed and balanced, a ceiling fan with remote operates quietly and safely in sleeping environments.
What is the maximum distance a remote can work?
This depends on whether the system uses RF (radio frequency) or IR (infrared).
• RF systems typically work within 20–50 feet and can operate through walls.
• IR systems require direct line-of-sight and have shorter range.
Most modern fan ceiling with remote systems use RF technology for reliability and flexibility within residential spaces.
How do I know if my ceiling can support a ceiling fan?
To safely install a fan ceiling with remote, the ceiling must have:
• A fan-rated electrical box
• Secure joist attachment
• Structural support for rotational load
If replacing a light fixture, do not assume the existing box is sufficient.
When in doubt, consult a licensed electrician — especially for older homes or vaulted ceilings.