
Table of Contents
If you’ve ever stood in a room that felt like a cave—or worse, like an operating room—you already know this: lighting can make or break a space.
The question most homeowners and even contractors get wrong isn’t what fixture to buy. It’s this:
How many lumens per square foot do you actually need?
Get the lumens per square foot calculation wrong, and you’ll either waste money over-lighting the room or live with shadows and eye strain for years.
In this guide, I’m going to walk you through:
- Exactly how many lumens per square foot different rooms require
- How to calculate lumens per square foot step by step
- Real-world examples (200 sq ft, 250 sq ft, 12×12, 20×20)
- How many recessed lights per square foot you should install
- Why 3,000 or 5,000 lumens might feel completely different depending on layout
Let’s get into it.
What Does “Lumens Per Square Foot” Really Mean?
Before we start calculating anything, we need to get clear on what lumens per square foot actually measures.
Lumens vs. Watts – Why Brightness Is Measured in Lumens
For decades, people judged brightness by watts. A 60-watt bulb meant “normal brightness.” A 100-watt bulb meant “bright.”
That no longer works.
Watts measure energy consumption, not brightness. With LED technology, a 10-watt LED can produce the same light as a 60-watt incandescent.
What actually measures brightness is lumens.
- Lumens = total light output
- More lumens = more visible brightness
So when we talk about lumens per square foot, we’re talking about how much light is distributed across a specific area.
This gives you a much more precise way to plan lighting than guessing based on wattage.
Foot-Candles vs. Lumens Per Square Foot
In professional lighting design, you’ll often hear the term foot-candle.
Here’s the important relationship:
1 foot-candle = 1 lumen per square foot
They’re essentially the same measurement.
Lighting engineers use foot-candles. Homeowners tend to search for how many lumens per square foot.
Different language. Same concept.
Industry organizations recommend foot-candle ranges for specific environments:
- Living spaces: 10–20 foot-candles
- Office environments: 30–50 foot-candles
- Retail spaces: 50+ foot-candles
That’s where lumens per sq foot becomes your practical planning tool.
Why Lumens Per Sq Foot Is the Most Practical Planning Metric
Here’s why professionals rely on lumens per square foot instead of guessing:
- It prevents under-lighting.
- It prevents over-lighting.
- It gives predictable results across room sizes.
- It scales easily for both residential and commercial spaces.
If you know the square footage and you know the recommended lumens per sq foot, you can calculate lighting with precision.
And that brings us to the next critical question.
How Many Lumens Per Square Foot Do You Actually Need?
This is what most people are searching for when they type “how many lumens per square foot.”
The answer depends on function.
Standard Residential Recommendations
Here’s what works in real homes:
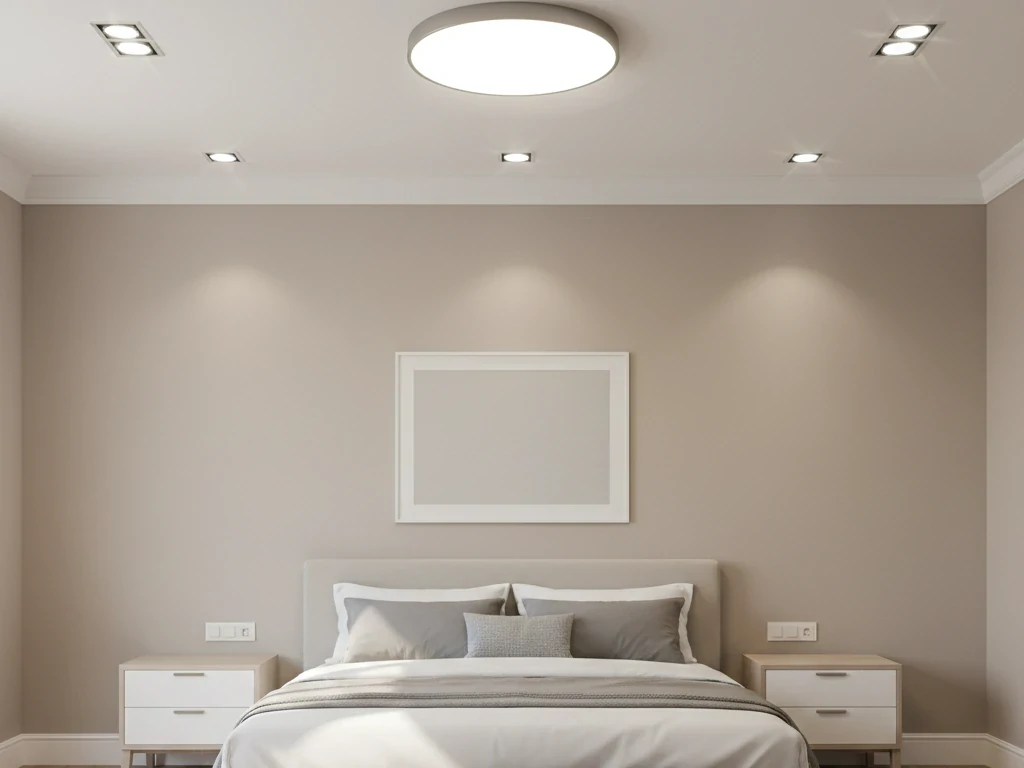
- Living room: 10–20 lumens per square foot
- Bedroom: 10–20 lumens per sq foot
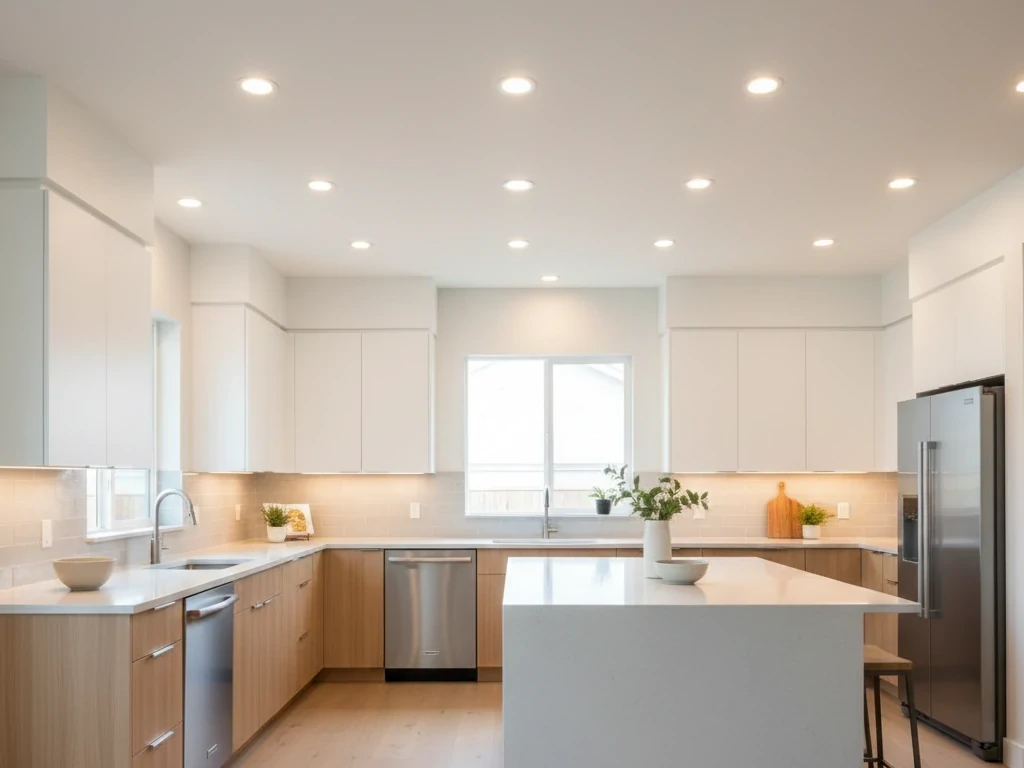
- Kitchen: 30–40 lumens per square foot
- Bathroom: 30–70 lumens per sq foot
- Hallways: 5–10 lumens per square foot
Notice something important: kitchens and bathrooms require much higher lumens per square foot because they’re task-oriented.
You’re chopping vegetables. Applying makeup. Shaving. You need clarity.
Commercial Lighting Standards
Commercial spaces raise the bar.
- Offices: 30–50 lumens per square foot
- Retail stores: 50–100 lumens per sq foot
- Warehouses: 20–50 lumens per square foot
- Medical facilities: 50–75+ lumens per square foot
Higher lumens per square foot improve visibility and reduce eye strain in work environments.
This is why using the correct lumens per square foot isn’t cosmetic—it’s functional.
Factors That Change Required Lumens
Even if you know how many lumens per square foot are recommended, adjustments matter.
Ceiling height An 8-foot ceiling is baseline. 10-foot ceilings? Increase total lumens by 10–20%.
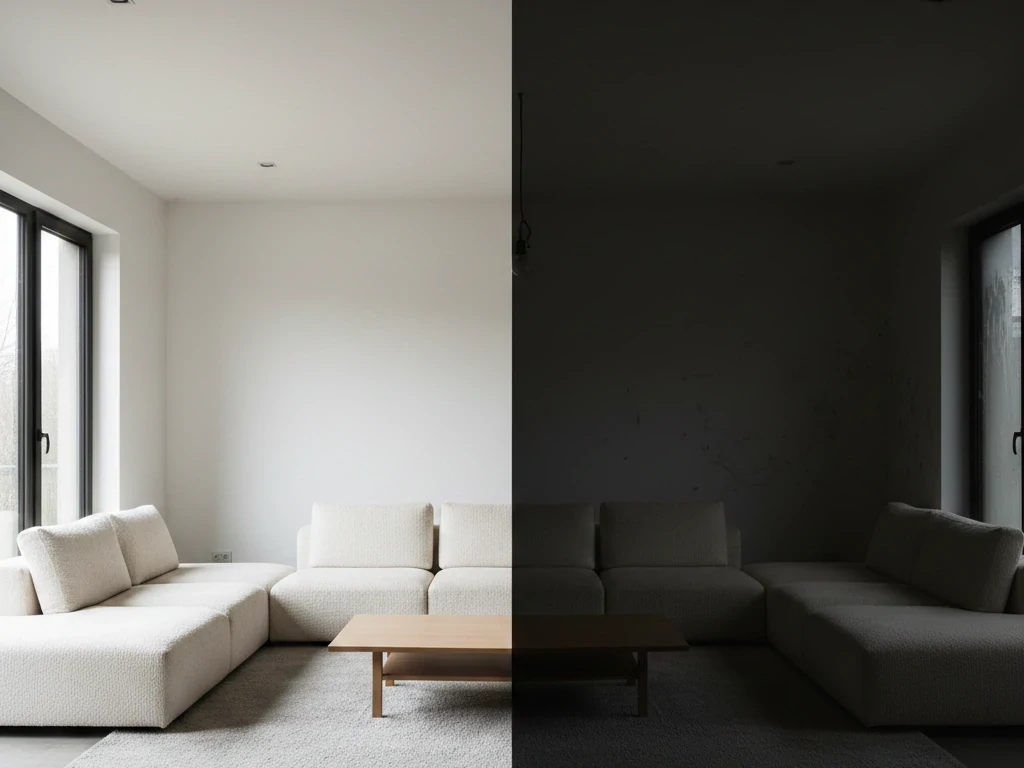
Wall color Dark walls absorb light. White walls reflect it.
Natural light South-facing rooms need fewer artificial lumens per square foot during daytime.
Task zones Layered lighting often works better than blasting a room with a single high-output fixture.
How to Calculate Lumens Per Square Foot (Step-by-Step)
If you’ve ever wondered why one room feels perfectly balanced while another feels dim or harsh, the answer almost always comes down to one thing: accurate lumens per square foot planning.
This section walks you through exactly how to calculate lumens per square foot, using the same approach electricians and lighting designers use in the field.
Step 1 – Measure the Exact Square Footage (Start With Real Numbers)
Before you calculate anything, you need accurate dimensions.
Formula: Length × Width = Total Square Footage
Example:
- 15 ft × 18 ft = 270 square feet
That 270 sq ft number is the foundation of your lumens per square foot calculation. If you get this wrong, everything else falls apart.
Pro Tip (Field Experience): Always measure wall-to-wall, not usable floor space. Lighting fills the entire volume of the room, not just the area between furniture.
For irregular rooms:
- Break into rectangles
- Calculate each section
- Add them together
Step 2 – Determine the Recommended Lumens Per Square Foot for the Room’s Purpose
This is where most homeowners make mistakes.
They ask:
“How many lumens per square foot do I need?”
But they don’t define the function of the room first.
Here are practical ranges used in residential and light commercial environments:
| Room Type | Recommended Lumens Per Square Foot |
|---|---|
| Living Room | 10–20 lumens per sq foot |
| Bedroom | 10–20 lumens per square foot |
| Kitchen | 30–40 lumens per sq foot |
| Bathroom | 30–70 lumens per square foot |
| Office | 30–50 lumens per sq foot |
These ranges align with professional foot-candle guidelines, where:
1 foot-candle = 1 lumen per square foot
So when industry recommendations call for 30 foot-candles in an office, that means 30 lumens per square foot.
Step 3 – Apply the Core Formula (This Is the Math That Matters)
Now we calculate.
Core Formula:
Total Lumens Needed =
Room Square Footage × Recommended Lumens Per Square Foot
Let’s run a realistic example.
Room size: 270 sq ft
Recommended lighting: 20 lumens per square foot
270 × 20 = 5,400 lumens
That’s your total light output target.
This is the fundamental method for how to calculate lumens per square foot correctly.
You can now scale this to any room.
Step 4 – Adjust for Ceiling Height (Most DIYers Skip This)
The standard lumens per square foot recommendations assume an 8-foot ceiling.
If your ceiling is higher, light disperses more before reaching usable surfaces.
Use this adjustment guideline:
- 8 ft ceiling → No adjustment
- 9–10 ft ceiling → Add 10–20% more lumens
- 11–14 ft ceiling → Add 20–40% more lumens
- Vaulted ceilings → May require layered lighting
Example:
5,400 lumens base requirement
10 ft ceiling → Add 15%
5,400 × 1.15 = 6,210 lumens
Now your adjusted lumens per square foot total is accurate for your ceiling height.
Skipping this step is why tall rooms often feel underlit.
Step 5 – Account for Surface Reflectivity and Room Color
Light behaves differently in different environments.
White walls reflect light efficiently.
Dark paint absorbs light.
If the room has:
- Dark floors
- Dark walls
- Matte finishes
- Heavy furniture
You may need 5–15% more lumens per square foot.
Conversely, light-colored rooms with reflective surfaces may allow you to stay at the lower end of the recommended range.
Professional designers call this “reflectance correction.”
Most homeowners simply call it “why does this room still feel dim?”
Step 6 – Divide Lumens Across Fixtures (Where Theory Meets Installation)
Now that you know your total lumens requirement, you must distribute it.
Let’s say your final adjusted requirement is:
6,000 lumens
If each recessed light provides 800 lumens:
6,000 ÷ 800 = 7.5
Round up → 8 fixtures
This is where the common question comes in:
How many recessed lights per square foot do I need?
There isn’t a universal number per square foot because it depends on fixture output. Instead:
- Calculate total lumens per square foot.
- Divide by fixture lumen output.
- Check spacing for uniform coverage.
Step 7 – Use Proper Recessed Light Spacing Guidelines
Correct spacing prevents uneven brightness.
A practical rule used in the field:
Divide ceiling height by 2 = approximate spacing between recessed lights
Example:
8 ft ceiling → 4 ft spacing
10 ft ceiling → 5 ft spacing
Even if your lumens per square foot calculation is correct, poor spacing creates shadows and bright spots.
Good lighting isn’t just about math. It’s about distribution.
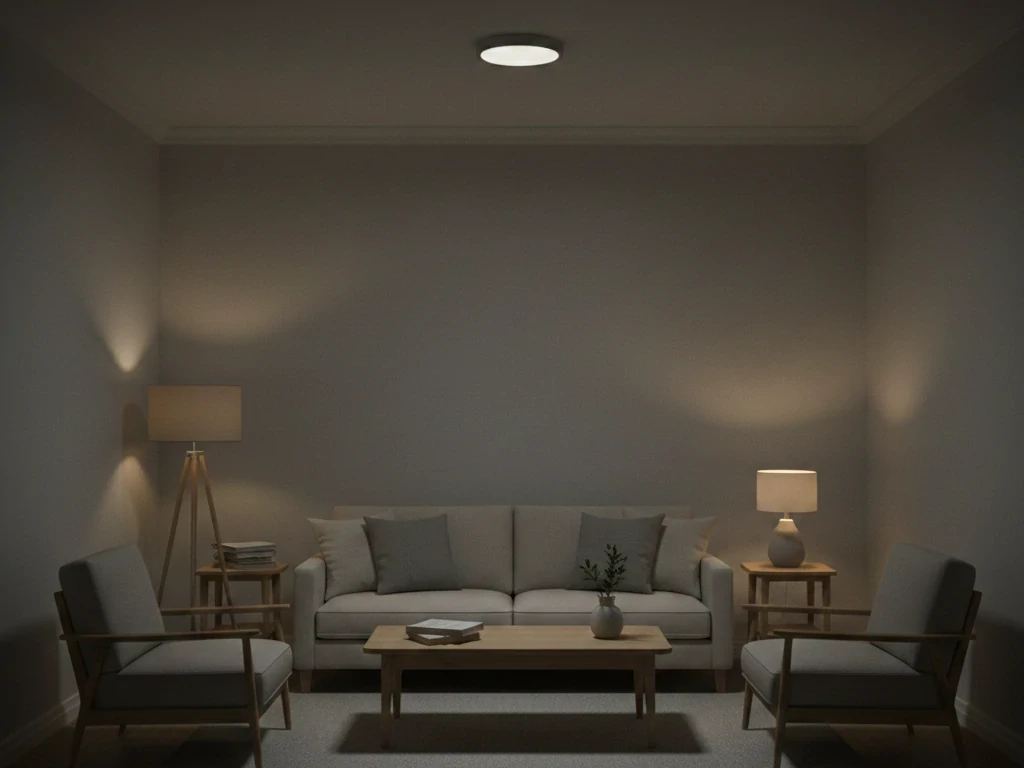
Step 8 – Consider Layered Lighting (Advanced Professional Step)
Professionals rarely rely on a single light source.
Instead of pushing lumens per square foot too high with one fixture, they layer lighting:
- Ambient lighting (general illumination)
- Task lighting (focused brightness)
- Accent lighting (visual depth)
This approach allows you to stay within recommended lumens per square foot while increasing functionality.
For example:
Instead of blasting a kitchen with 45 lumens per sq foot entirely from ceiling lights, you might:
- Use 30 lumens per square foot for ambient
- Add under-cabinet lighting for task zones
Better control. Less glare. More comfort.
Step 9 – Verify With Real-World Testing (What Pros Actually Do)
Even after calculating lumens per square foot, experienced installers test:
- Light uniformity
- Glare
- Shadow patterns
- Dimming capability
If a space feels too bright or too dim, adjustments are made.
Lighting design is math plus experience.
As one commercial lighting contractor put it:
“Numbers get you close. Testing gets you perfect.”
Step 10 – Final Checklist Before Installation
Before you commit:
✔ Confirm square footage
✔ Confirm correct lumens per square foot range
✔ Adjust for ceiling height
✔ Account for reflectivity
✔ Confirm fixture lumen output
✔ Plan spacing layout
If you follow these steps carefully, you won’t just guess how many lumens per square foot you need—you’ll know.
And that’s the difference between amateur lighting and professional-level planning.

The Exact Formula for Calculating Lumens
Let’s formalize it.
The Core Formula
Total Lumens Needed = Room Square Footage × Recommended Lumens Per Square Foot
This formula answers “how many lumens per square foot” in a practical way.
Advanced Lighting Formula for Professionals
Designers sometimes use lux:
Total Lumens = Lux × Area (m²)
Since:
1 foot-candle = 10.764 lux
You can convert easily if working with metric measurements.
Converting Between Lux and Lumens Per Square Foot
If someone gives you 300 lux as a recommendation:
300 ÷ 10.764 ≈ 28 lumens per square foot
This is common in office design.
Understanding both systems strengthens your lighting planning skills.
Room-by-Room Lighting Calculation Examples
Let’s apply real numbers.
How Many Lumens Do You Need for a 200 Square Foot Room?
If general lighting requires 20 lumens per square foot:
200 × 20 = 4,000 lumens
If it’s a kitchen:
200 × 35 = 7,000 lumens
So the answer depends entirely on function.
How Many Lumens for a 250 Sq Ft Room?
250 × 20 = 5,000 lumens
At 30 lumens per sq foot:
250 × 30 = 7,500 lumens
That’s a noticeable difference.
How Many Lumens Do I Need for a 12×12 Room?
12 × 12 = 144 sq ft
144 × 20 = 2,880 lumens
Round to about 3,000 lumens.
Now you see why 3,000 lumens is often marketed as “room coverage.”
How Many Lumens to Light a 20×20 Room?
20 × 20 = 400 sq ft
400 × 20 = 8,000 lumens
Task-heavy environment?
400 × 40 = 16,000 lumens
That’s double the output.
How Much Area Does 5000 Lumens Cover?
This is one of the most searched lighting questions online — and it’s usually asked the wrong way.
People don’t actually want to know what 5,000 lumens is. They want to know:
- Will 5,000 lumens light my garage?
- Is 5,000 lumens enough for a 250 sq ft room?
- Will it feel too bright in a bedroom?
- How does it translate into lumens per square foot?
The truth is simple:
5,000 lumens doesn’t cover a fixed area. It depends entirely on your target lumens per square foot.
Let’s break this down properly.
The Core Formula – Area Coverage Depends on Lumens Per Square Foot
To determine how much area 5,000 lumens can illuminate, you use the same formula discussed earlier:
Area Covered = Total Lumens ÷ Target Lumens Per Square Foot
This connects directly to the concept of lumens per square foot, which is the only reliable way to evaluate brightness.
Let’s look at real-world numbers.
If your target is:
- 20 lumens per square foot (comfortable living room lighting) 5,000 ÷ 20 = 250 square feet
- 30 lumens per sq foot (brighter task lighting) 5,000 ÷ 30 ≈ 167 square feet
- 40 lumens per square foot (kitchen or workspace) 5,000 ÷ 40 = 125 square feet
- 50 lumens per sq foot (retail or workshop level brightness) 5,000 ÷ 50 = 100 square feet
Same lumens. Completely different coverage.
That’s why asking “how much area does 5000 lumens cover?” without referencing lumens per square foot leads to misleading answers.
Residential Scenarios – Where 5,000 Lumens Works Well
Now let’s apply real-life logic.
Living Room (250 sq ft)
Target: 20 lumens per square foot
Result: 5,000 lumens is nearly perfect.
At 250 sq ft, 5,000 lumens provides balanced ambient lighting without feeling clinical.
Medium Bedroom (200 sq ft)
Target: 15 lumens per sq foot
Required: 3,000 lumens
If you install 5,000 lumens in a 200 sq ft bedroom:
5,000 ÷ 200 = 25 lumens per square foot
That may feel intense unless dimmable.
Kitchen (150 sq ft)
Target: 35–40 lumens per square foot
Required: 5,250–6,000 lumens
In this case, 5,000 lumens might feel slightly underpowered unless supplemented with task lighting.
The takeaway?
5,000 lumens is comfortable in a 250 sq ft living room, strong in a 150 sq ft workspace, and potentially overpowering in a small bedroom.
Commercial and Utility Spaces – Where 5,000 Lumens Falls Short
In work-oriented environments, higher lumens per square foot standards apply.
For example:
Office (200 sq ft)
Target: 40 lumens per square foot
Required: 8,000 lumens
5,000 lumens would only provide:
5,000 ÷ 200 = 25 lumens per sq foot
That’s below recommended productivity levels.
Garage Workspace (125 sq ft)
Target: 40 lumens per square foot
5,000 ÷ 40 = 125 sq ft
Here, 5,000 lumens is ideal for a focused mechanical or hobby workspace.
Professional lighting guidelines emphasize adequate brightness for safety and visual clarity. Under-lighting commercial spaces increases eye strain and reduces efficiency.
Is 3000 Lumens Too Bright for a Bedroom?
Let’s calculate.
If bedroom is 200 sq ft:
200 × 15 = 3,000 lumens
That’s 15 lumens per square foot.
Comfortable.
If bedroom is 120 sq ft:
120 × 15 = 1,800 lumens
Now 3,000 lumens would push it to 25 lumens per square foot.
That may feel harsh unless dimmable.
So 3,000 lumens isn’t “too bright” in theory—it depends on room size and layering.
How Many Recessed Lights Per Square Foot?
This is where lighting theory meets drywall, wiring, and real-life installation.
Homeowners often ask:
- How many recessed lights per square foot do I need?
- How far apart should recessed lights be spaced?
- Can I just follow a spacing rule instead of calculating lumens per square foot?
Here’s the honest answer:
There is no universal number of recessed lights per square foot.
The correct number depends on:
- Your required lumens per square foot
- The lumen output of each recessed fixture
- Ceiling height
- Beam spread
- Room function
Let’s break this down properly.
Step 1 – Start With Lumens Per Square Foot (Not Fixture Count)
Before you even think about layout, you must determine how many lumens per square foot the room requires.
For example:
- Living room → 15–20 lumens per square foot
- Kitchen → 30–40 lumens per sq foot
- Office → 30–50 lumens per square foot
If you skip this step, you’re designing blind.
Let’s say you have a 240 sq ft kitchen and you want 35 lumens per square foot:
240 × 35 = 8,400 total lumens required
That number drives everything else.
Step 2 – Divide Total Lumens by Fixture Output
Now we determine how many recessed lights per square foot indirectly — by dividing total lumens by each fixture’s lumen output.
If each recessed light produces 900 lumens:
8,400 ÷ 900 ≈ 9.3
Round up → 10 fixtures
Now your layout target is 10 recessed lights.
Notice something important:
We did not ask how many recessed lights per square foot directly.
We calculated lumens per square foot first.
That’s how professionals ensure consistent brightness.
Step 3 – Apply Proper Spacing Rules
After determining fixture count, spacing ensures even distribution.
A commonly used professional guideline:
Divide ceiling height by 2 = approximate spacing distance
Examples:
- 8 ft ceiling → 4 ft spacing
- 10 ft ceiling → 5 ft spacing
- 12 ft ceiling → 6 ft spacing
This spacing rule prevents spotlight clusters and shadow zones.
Even if your lumens per square foot calculation is correct, poor spacing ruins the result.
Step 4 – Understand the “Recessed Lights Per Square Foot” Myth
You may see suggestions like:
- One recessed light every 25 sq ft
- One recessed light every 16 sq ft
These rules are oversimplified.
Why?
Because recessed lights vary dramatically in lumen output.
A 600-lumen recessed fixture and a 1,200-lumen recessed fixture produce completely different lumens per square foot results.
Example:
Room size: 200 sq ft
8 recessed lights installed
If each fixture is 600 lumens:
8 × 600 = 4,800 lumens
4,800 ÷ 200 = 24 lumens per square foot
If each fixture is 1,000 lumens:
8 × 1,000 = 8,000 lumens
8,000 ÷ 200 = 40 lumens per square foot
Same fixture count. Completely different brightness level.
That’s why professionals never rely on fixture count alone.
Step 5 – Adjust for Ceiling Height and Beam Spread
Higher ceilings reduce effective brightness at working level.
If your ceiling exceeds 9 feet:
- You may need more lumens per square foot
- Or fixtures with tighter beam angles
Wide beam angles create soft ambient lighting.
Narrow beam spreads concentrate brightness below each fixture.
This affects how many recessed lights per square foot you truly need.
A 60-degree beam spreads light differently than a 100-degree beam.
Spacing must account for overlap to avoid uneven brightness.
Step 6 – Room-by-Room Practical Examples
Let’s look at realistic scenarios.
Example 1: 180 sq ft Living Room
Target: 20 lumens per square foot
Total required: 3,600 lumens
Using 800-lumen recessed fixtures:
3,600 ÷ 800 = 4.5
Round up → 5 fixtures
That’s approximately one recessed light per 36 sq ft.
Example 2: 150 sq ft Kitchen
Target: 35 lumens per square foot
Total required: 5,250 lumens
Using 900-lumen fixtures:
5,250 ÷ 900 ≈ 6
Six evenly spaced recessed lights.
This produces proper task brightness without glare.
Example 3: 400 sq ft Open Living Area
Target: 20 lumens per square foot
Total required: 8,000 lumens
Using 1,000-lumen fixtures:
8,000 ÷ 1,000 = 8 fixtures
That equals one recessed light per 50 sq ft.
Notice the pattern?
Fixture count per square foot varies depending on lumen output and target lumens per square foot.
Step 7 – Avoid the “Airport Runway” Effect
One of the most common design mistakes is lining recessed lights in a straight row down the center.
This creates:
- Bright center strip
- Dark perimeter walls
- Uneven lumens per square foot distribution
Professional layouts:
- Use grid patterns
- Offset fixtures evenly
- Keep equal wall spacing
- Ensure beam overlap
Lighting should feel uniform, not spotlighted.
Step 8 – Layered Lighting Reduces Recessed Light Count
If you rely entirely on recessed lights for brightness, you may over-install.
Instead, professionals use:
- Under-cabinet lighting
- Pendant fixtures
- Floor lamps
- Wall sconces
This allows you to maintain proper lumens per square foot while reducing glare from ceiling fixtures.
In kitchens, for example:
- 25 lumens per square foot ambient
- Task lighting adds localized brightness
This approach improves comfort and visual balance.
Step 9 – Energy Efficiency and Dimming Considerations
Modern recessed lighting often includes dimming capability.
Instead of overshooting lumens per square foot and relying on dimming, professionals calculate properly from the beginning.
Too many fixtures increase:
- Installation cost
- Energy use
- Heat load
Correct lumens per square foot planning reduces unnecessary fixtures.
Quick Reference Guide
| Room Size | Target Lumens Per Square Foot | Typical Fixture Count (800–1000 lumens each) |
|---|---|---|
| 150 sq ft | 20 | 4–5 fixtures |
| 200 sq ft | 20 | 5–6 fixtures |
| 250 sq ft | 30 | 8–9 fixtures |
| 400 sq ft | 20 | 8–10 fixtures |
These are general planning ranges — always calculate based on actual lumen output.
Final Answer: How Many Recessed Lights Per Square Foot?
There is no fixed number.
The correct approach is:
- Determine required lumens per square foot
- Multiply by room size
- Divide by fixture lumen output
- Space according to ceiling height
When you calculate properly, you won’t guess how many recessed lights per square foot to install.
You’ll know — and your lighting will look intentional, balanced, and professional.
Common Mistakes When Calculating Lumens Per Square Foot
If there’s one thing I’ve seen repeatedly — in homes, offices, retail spaces, even new construction builds — it’s this:
People don’t struggle because they lack lighting products. They struggle because they misunderstand lumens per square foot.
The math itself is simple. The execution is where mistakes happen.
Below are the most common errors made when calculating lumens per square foot, why they happen, and how professionals avoid them.
Mistake #1 – Confusing Lumens With Watts
This is still the most widespread misunderstanding.
Watts measure energy consumption.
Lumens measure brightness.
When someone asks, “How many 60-watt bulbs do I need?” they’re asking the wrong question.
In modern lighting:
- A low-watt fixture can produce high lumens.
- Two fixtures with identical wattage can produce completely different lumens per square foot.
Professionals ignore watts when planning brightness. They focus strictly on total lumens and how those lumens translate into lumens per square foot across the space.
If you calculate based on wattage instead of lumens, your results will be inconsistent and unreliable.
Mistake #2 – Skipping the Lumens Per Square Foot Calculation Entirely
Many homeowners decide lighting based on fixture count alone.
“I’ll put six recessed lights in the ceiling. That should be fine.”
Fine based on what?
Without calculating how many lumens per square foot the room requires, fixture count is guesswork.
Here’s what happens when the calculation is skipped:
- Small rooms become over-lit and harsh.
- Large rooms feel dim and uneven.
- Kitchens lack task visibility.
- Living rooms feel sterile.
Professionals always begin with:
Room Area × Recommended Lumens Per Square Foot = Target Lumens
Everything else comes after that.
Mistake #3 – Ignoring Ceiling Height Adjustments
Standard lumens per square foot guidelines assume an 8-foot ceiling.
But many homes now feature:
- 9–10 ft ceilings
- 12 ft ceilings
- Vaulted or sloped ceilings
Light intensity decreases as distance from the source increases.
If you calculate 20 lumens per square foot for a 400 sq ft room with a 12-foot ceiling and don’t adjust upward, the room will feel underlit.
Professionals typically increase total lumens by:
- 10–20% for 9–10 ft ceilings
- 20–40% for ceilings above 11 ft
Failing to account for ceiling height is one of the most common causes of “the numbers looked right, but it feels dim.”
Mistake #4 – Forgetting About Surface Reflectivity
Light doesn’t behave the same in every room.
White walls reflect light efficiently.
Dark matte walls absorb it.
If you apply the same lumens per square foot calculation to:
- A bright white kitchen
- A charcoal-painted home theater
The perceived brightness will be dramatically different.
Professionals factor in reflectivity because it directly impacts effective lumens per square foot.
In darker rooms, you may need 5–15% more lumens to achieve the same visual comfort.
Ignoring this factor leads to misjudging brightness after installation.
Mistake #5 – Over-Lighting Instead of Layering
Another common mistake is pushing lumens per square foot too high through ceiling fixtures alone.
For example:
Instead of using 25 lumens per square foot ambient plus task lighting, someone installs 45 lumens per square foot from recessed lights alone.
The result:
- Glare
- Eye fatigue
- Flat, clinical appearance
Professional lighting design uses layering:
- Ambient lighting for base lumens per square foot
- Task lighting where precision is needed
- Accent lighting for depth and dimension
Over-lighting the entire room to compensate for task zones is inefficient and uncomfortable.
Mistake #6 – Relying on “One Light Per X Square Feet” Rules
You may have seen advice like:
- One recessed light per 25 square feet
- One fixture every 4 feet
These rules ignore one critical variable:
Fixture lumen output.
Two rooms of equal size can require completely different numbers of recessed lights per square foot depending on:
- Required lumens per square foot
- Lumen output per fixture
- Beam spread
Professionals never start with fixture spacing alone. They calculate total lumens first.
Mistake #7 – Ignoring Uniformity and Distribution
Even if your total lumens per square foot calculation is correct, poor distribution ruins the result.
Common layout errors include:
- All fixtures in a straight center line
- No perimeter lighting
- Wide gaps between lights
- Bright hotspots with dark corners
Uniformity matters.
Professionals ensure overlapping light patterns so lumens per square foot remain consistent across the room — not just directly beneath fixtures.
Even lighting feels natural. Uneven lighting feels cheap.
Mistake #8 – Not Matching Lumens Per Square Foot to Room Function
A bedroom does not need the same lumens per square foot as a kitchen.
Yet many installations apply identical brightness levels throughout the house.
For example:
- 40 lumens per square foot in a bedroom → Harsh and uncomfortable
- 15 lumens per square foot in a kitchen → Insufficient task visibility
Function drives brightness.
Experienced installers ask:
“What activities happen here?”
That determines the appropriate lumens per square foot range.
Mistake #9 – Forgetting Dimming Capability
Some homeowners over-install lumens per square foot assuming they can dim later.
But:
- Not all fixtures dim smoothly.
- Overpowered lighting still creates glare before dimming.
- Higher fixture count increases cost and complexity.
Professionals calculate correct lumens per square foot first, then use dimming as refinement — not correction.
Mistake #10 – Treating Lighting as Decoration Instead of Infrastructure
Lighting is often chosen for aesthetics first.
While fixture style matters, brightness planning is infrastructure-level work.
When lumens per square foot are calculated properly:
- Spaces feel balanced.
- Colors render accurately.
- Tasks become easier.
- Energy use remains efficient.
When ignored, even beautiful fixtures can produce uncomfortable spaces.
Lighting is not just design — it’s environmental engineering.
Final Takeaway
Calculating lumens per square foot isn’t complicated — but it must be done methodically.
The most common failures happen when people:
- Guess instead of calculate
- Ignore room function
- Skip ceiling height adjustments
- Focus on fixture count instead of total lumens
- Forget distribution
When done correctly, lighting feels effortless.
When done incorrectly, it’s something you notice every day.
Understanding these mistakes doesn’t just help you avoid them — it elevates your approach from trial-and-error to professional-grade planning.
Conclusion
Here’s the truth.
Lighting isn’t about buying the brightest fixture.
It’s about matching lumens per square foot to the room’s purpose.
If you:
- Measure correctly
- Choose appropriate lumens per sq foot
- Adjust for ceiling height
- Distribute fixtures evenly
You’ll get professional results.
And whether you’re a homeowner deciding to DIY or a contractor planning installation, understanding lumens per square foot puts you in control.
Lighting done right feels effortless.
Lighting done wrong is something you notice every single day.
FAQs – Expert Answers to Common Lighting Questions
How many lumens do you need per square foot?
Most homes require 10–20 lumens per square foot. Kitchens and task areas need 30–40 lumens per sq foot. Commercial spaces often require more.
How much area does 5000 lumens cover?
At 20 lumens per square foot, 5,000 lumens covers about 250 sq ft. At 40 lumens per sq foot, it covers around 125 sq ft.
How many lumens do I need for a 200 square foot room?
Approximately 4,000–6,000 lumens, depending on usage.
How many lumens for a 250 sq ft room?
Around 5,000 lumens for general lighting. Up to 7,500 lumens for brighter tasks.
Is 3000 lumens too bright for a bedroom?
Not necessarily. In a 200 sq ft bedroom, that equals 15 lumens per square foot, which is comfortable.
How many lumens do I need for a 12×12 room?
A 12×12 room (144 sq ft) needs about 2,500–3,000 lumens.
How many lumens to light a 20×20 room?
A 20×20 room (400 sq ft) requires around 8,000 lumens for general lighting.
What is the formula for calculating lumens?
Total Lumens Needed = Room Area × Recommended Lumens Per Square Foot