
Table of Contents
If you’ve ever stood in a dark room clicking a dead remote and wondering why nothing is happening, this guide is for you.
Remote control LED lights are supposed to make life easier. One click and your indoor light shifts from warm white to cool daylight. One tap and your living room turns into a soft ambient glow. But when they don’t respond, won’t sync, or seem incompatible, frustration sets in quickly.
By the time you finish reading, you’ll know:
– How remote control LED lights actually work
– Whether you can install and pair them yourself
– How to sync LED lights to remote correctly
– What to do if you lost your remote
– Why your LED lights remote not working is more common than you think
– Whether upgrading to phone control is worth it
Let’s get into it.
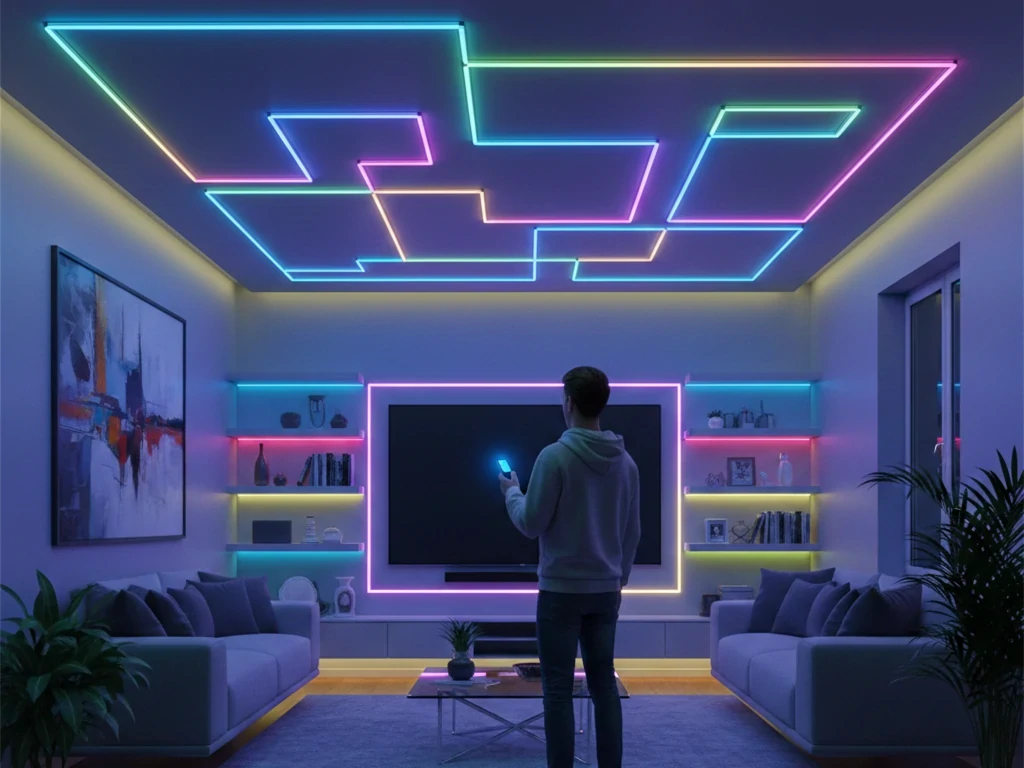
Why Remote Control LED Lights Are Dominating Modern Indoor Lighting
Walk into almost any renovated home in the U.S. today and you’ll see it: layered lighting, accent strips, dimmable ceiling panels, and multiple lighting zones controlled wirelessly. Remote control LED lights have shifted from novelty to standard.
Industry data shows the smart and connected lighting market continues to grow at double-digit rates annually. But even beyond smart systems, simple led lights with remote are now common in bedrooms, kitchens, offices, and gaming setups.
The Rise of Smart Indoor Light Solutions
Homeowners want three things from lighting:
- Convenience
- Flexibility
- Energy efficiency
Traditional wall switches only offer on or off. Today’s indoor light systems allow:
- Adjustable brightness
- Dynamic color temperature
- RGB color scenes
- Timers and scheduling
- Multi-zone control
According to lighting engineers interviewed in trade publications, lighting is no longer just functional. It’s architectural and emotional. The ability to control mood lighting from across the room—or across the house—is a game changer.
That’s exactly where remote control LED lights shine.
Types of LED Lights With Remote
Not all led lights with remote are built the same. Here’s what you’ll typically encounter:
- LED strip lights with remote Flexible, adhesive-backed strips used for accent lighting, under cabinets, behind TVs, and in coves.
- Ceiling panel indoor light systems Integrated LED fixtures with RF or IR remotes for brightness and color temperature adjustment.
- RGB vs RGBW systems RGB systems mix red, green, and blue for color. RGBW adds a dedicated white channel for better natural white output.
- Signal type differences
- IR (Infrared) – requires line of sight
- RF (Radio Frequency) – works through walls
- Bluetooth – short-range app control
- WiFi – network-based remote access
Understanding these differences prevents 90% of compatibility issues later.
How Remote Control Improves User Experience
Let’s be honest. Nobody wants to get up every time lighting needs adjusting.
With properly configured remote control LED lights, you can:
- Dim brightness for movie nights
- Change colors instantly for events
- Set a timer for kids’ bedtime
- Switch color temperature during work hours
The best systems respond instantly. No lag. No flicker. Just smooth control.
How Do Remote Control LED Lights Actually Work?
If you’ve ever pressed a button on your remote and watched your room instantly shift from cool white to deep blue, you’ve already experienced the precision behind remote control LED lights. But what’s really happening under the hood?
Understanding how these systems work isn’t just technical trivia. It’s the difference between blindly replacing parts and confidently diagnosing issues like signal failure, pairing errors, or why your LED lights remote not working suddenly became a problem.
Let’s break this down the way a field installer or lighting engineer would.
The Four Core Components of Remote Control LED Lights
Every reliable remote control LED lights system includes four essential elements:
- LED Light Source (Strip or Fixture)
This is the visible part — the LED strip, panel, or integrated indoor light fixture. Most residential systems run on low-voltage DC power (typically 12V or 24V). The LEDs themselves are semiconductor diodes that emit light when current passes through them.
- Power Supply (Driver or Transformer)
Household power in the U.S. is 120V AC. LED strips require low-voltage DC. The power supply converts AC to DC and regulates voltage. A mismatch here is one of the most common causes of flickering or complete failure.
- LED Controller
Think of this as the brain. The controller sits between the power supply and the LEDs. It receives commands from the led light remote control, then adjusts voltage output, color channels, or brightness accordingly.
- Remote Transmitter
The handheld remote sends encoded signals to the controller. These signals can be infrared (IR), radio frequency (RF), Bluetooth, or WiFi-based depending on the system.
If your led strip lights with remote stop responding, one of these four components is almost always responsible.
Signal Types – IR vs RF vs Bluetooth vs WiFi
Not all remote control LED lights communicate the same way. The signal type determines reliability, range, and compatibility.
- Infrared (IR)
IR remotes work similarly to television remotes.
- Requires line-of-sight
- Signal blocked by cabinets or furniture
- Short-range (typically under 30 feet)
If your indoor light only works when you point directly at the controller, you likely have IR. Many budget led lights with remote use this method.
Common failure cause: blocked receiver sensor.
- Radio Frequency (RF)
RF systems use radio waves instead of light.
- No line-of-sight needed
- Can pass through drywall
- Longer range (up to 100 feet in some cases)
RF-based remote control LED lights are more stable in larger homes or multi-zone setups. This is often preferred for ceiling fixtures and under-cabinet systems where the controller is hidden.
- Bluetooth
Bluetooth-enabled controllers allow phone-based control within short range.
- Requires pairing
- Typically 30–50 feet range
- Low energy consumption
These are common in newer led strip lights with remote that also support app functionality.
- WiFi
WiFi-enabled controllers connect to your home network.
- Allows remote access from anywhere
- Supports scheduling and automation
- Requires stable internet
WiFi adds convenience but also introduces complexity. If connectivity drops, control may fail temporarily.
Understanding your signal type is critical before attempting to troubleshoot or learning how to sync LED lights to remote properly.
What Happens Electrically When You Press a Button?
Here’s the simplified but technically accurate sequence:
- You press a button on the led light remote control.
- The remote transmits a coded signal.
- The controller receives and decodes that signal.
- The controller adjusts output using Pulse Width Modulation (PWM).
- The LED brightness or color changes instantly.
Let’s unpack PWM, because it’s central to how remote control LED lights dim smoothly.
PWM rapidly switches power on and off at high frequency. The faster the “on” cycle relative to “off,” the brighter the LED appears. Your eyes perceive this as dimming, even though the LEDs are technically flickering thousands of times per second.
This method maintains color consistency and efficiency — one reason LED systems outperform older incandescent dimmers.
How to Control LED Light With Remote? (Step-by-Step Setup Guide)
If you’ve just purchased remote control LED lights and you’re staring at a strip, a power adapter, and a small white controller box wondering what connects to what — you’re not alone.
The good news? Most led lights with remote are straightforward once you understand the sequence. The bad news? Skipping one small detail — wrong voltage, loose polarity, poor placement — can leave you searching for “why is my LED lights remote not working” within minutes.
This guide walks you through the correct setup process the same way a professional installer would approach it.
Step 1 – Verify Voltage and System Compatibility (Before You Plug Anything In)
Before touching a wire, confirm three things:
- LED strip voltage (usually 12V or 24V)
- Power supply output voltage
- Controller voltage rating
They must match exactly.
If your led strip lights with remote are 12V and you connect them to a 24V driver, the LEDs can burn out instantly. If you underpower them, you’ll get dim output or flickering.
Professional tip: Always check the printed label on both the strip and the power supply. Don’t assume they’re compatible just because they came in the same box.
Step 2 – Connect the System in the Correct Order
Every remote control LED lights system follows the same wiring logic:
Wall outlet → Power supply → Controller → LED strip
Never connect the LED strip directly to AC power. The controller must sit between the power supply and the strip because it regulates brightness, color channels, and signal reception.
When connecting:
- Match positive (+) and negative (–) terminals.
- For RGB systems, align labeled channels (R, G, B, V+).
- Make sure connectors click firmly into place.
Loose connectors are one of the most common causes of flicker in indoor light installations.
Step 3 – Position the Controller Correctly
This step is often overlooked.
If your system uses IR (infrared) technology, the receiver must be visible. Hiding it inside a cabinet or behind drywall will block the signal from your led light remote control.
If your system uses RF, placement is more flexible — but avoid enclosing the controller in metal housings, which can reduce signal strength.
For long-term reliability:
- Keep the controller ventilated.
- Avoid placing it near high-heat appliances.
- Don’t stretch wires tightly — allow slight slack.
Proper placement prevents many cases of “why is my LED lights remote not working.”
Step 4 – Power On and Perform Initial Test
Once wired:
- Plug in the power supply.
- Turn on the wall switch (if applicable).
- Observe the LED strip.
Most remote control LED lights default to a neutral white or red color on first power-up.
If nothing happens:
- Double-check polarity.
- Confirm outlet is live.
- Test power supply output with a voltage tester if available.
Professionals always verify power before assuming signal failure.
Step 5 – Pair the Remote (If Required)
Many led lights with remote are pre-paired at the factory. Others require manual syncing.
To understand how to sync LED lights to remote, follow this general process:
- Power off the LED system.
- Power it back on.
- Within 5–10 seconds, press and hold the pairing button on the remote.
- Wait for the strip to blink or flash to confirm connection.
Timing matters. Most controllers only remain in pairing mode briefly after startup.
If pairing fails, repeat the process. If it still fails, reset the controller and try again.
Step 6 – Test All Functions Thoroughly
Don’t stop at “it turned on.”
Test:
- Brightness adjustment
- Color changes
- White temperature shift (if applicable)
- Flash/fade modes
- On/off response speed
Reliable remote control LED lights should respond instantly without delay or flicker.
If brightness jumps unevenly or colors appear inconsistent, the controller may be incompatible or underpowered.
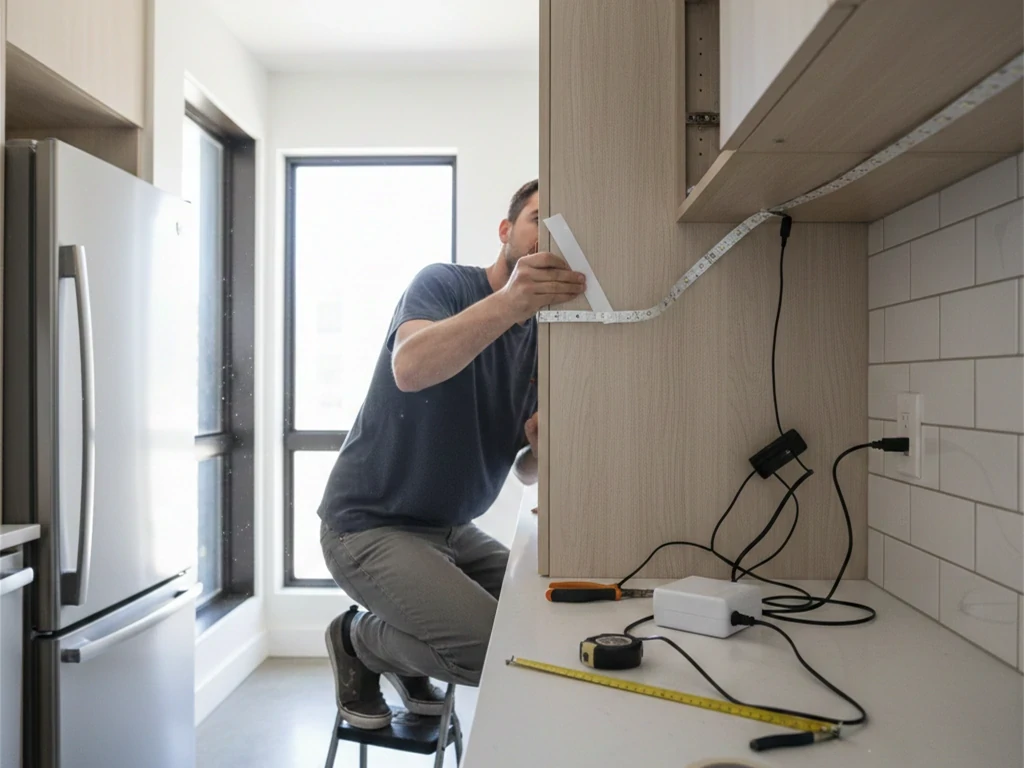
Step 7 – Secure Installation and Final Mounting
Once confirmed working:
- Mount LED strip securely using adhesive backing or clips.
- Secure controller in accessible but discreet location.
- Route wires neatly to prevent tension or damage.
For permanent indoor light installations, professionals recommend using mounting channels or raceways to protect wiring.
How to Sync LED Lights to Remote (Pairing Guide)
If your lights power on but won’t respond, you’re probably not dealing with a “broken strip.” You’re dealing with a pairing issue.
Understanding how to sync LED lights to remote is one of the most important skills when working with remote control LED lights. Syncing—also called pairing—allows the controller (the brain) to recognize the specific signal from your led light remote control. Without proper pairing, the remote and controller simply ignore each other.
The good news? In most cases, syncing takes less than 60 seconds—if you follow the correct sequence.
What Pairing Actually Means (And Why It Matters)
Pairing isn’t just “turning it on.”
When you sync led strip lights with remote, you are programming the controller to:
- Recognize a specific signal frequency
- Accept a specific remote code
- Ignore other remotes on similar frequencies
This is especially important in apartments, multi-room homes, or offices where multiple remote control LED lights systems may be installed nearby.
If your lights suddenly stopped responding, pairing may have been lost due to:
- Power interruption
- Controller reset
- Battery replacement timing
- Electrical surge
Before replacing anything, try re-syncing.
Step-by-Step: How to Sync LED Lights to Remote (Standard Method)
While exact timing varies slightly by manufacturer, most systems follow this general process:
Step 1 – Power Off the LED System Unplug the power supply or switch off the wall outlet.
Step 2 – Prepare the Remote Install fresh batteries in your led light remote control. Weak batteries are a common cause of sync failure.
Step 3 – Power On and Enter Pairing Window Turn the power back on. Most controllers enter pairing mode for 5–10 seconds immediately after startup.
Step 4 – Press and Hold the Pairing Button Within that window, press and hold the designated sync or on button for several seconds.
Step 5 – Look for Confirmation The lights usually blink, flash, or change color briefly to confirm successful pairing.
If your remote control LED lights flash once or twice, that’s your confirmation signal.
If nothing happens, repeat the process and be mindful of timing. Waiting too long after powering on is the most common mistake.
Alternative Pairing Method (For RF Systems)
For RF-based led lights with remote, the procedure sometimes differs slightly:
- Turn power on.
- Quickly press the ON button three times.
- Hold the button on the third press.
- Wait for visual confirmation (blink or color shift).
RF systems don’t require line-of-sight, but they still require exact timing. If your indoor light setup is hidden inside cabinets or ceiling cavities, RF pairing is often more reliable than IR.
Resetting the Controller Before Re-Syncing
If multiple pairing attempts fail, the controller may need a reset.
Here’s how professionals handle stubborn remote control LED lights:
Quick Reset Method
- Turn power off and on 3–5 times in quick succession.
- Leave power on after final cycle.
- Immediately attempt pairing.
Button Reset Method
- Some controllers include a small reset button.
- Hold for 5–10 seconds until lights flash.
- Release and reattempt sync.
Resetting clears stored codes, allowing the controller to accept a new remote.
This step often resolves “why is my LED lights remote not working” scenarios without replacing any hardware.
Pairing Multiple Zones (Advanced Setup)
If you’re installing multiple sets of led strip lights with remote in one space, pairing becomes more precise.
To prevent cross-control:
- Power on only one controller at a time.
- Pair each remote to its designated controller individually.
- Test immediately before powering on additional zones.
This ensures each indoor light system responds only to its assigned remote.
Professionals always isolate zones during sync to avoid signal overlap.
Why Syncing Sometimes Fails
If you’re repeatedly searching how to sync LED lights to remote and it still doesn’t work, here are the most common technical reasons:
- Frequency Mismatch Not all remotes operate on the same RF or IR frequency. Even visually identical remotes may be incompatible.
- Weak Batteries Low battery voltage reduces signal strength, especially in RF systems.
- Interference Nearby wireless devices, routers, or metal enclosures can disrupt signals.
- Controller Memory Corruption After power surges, some controllers require full reset.
- Incorrect Voltage Power Supply Undersized power supplies can cause unstable behavior, preventing successful pairing.
Understanding these factors prevents unnecessary replacement of otherwise functional remote control LED lights.
Syncing Smart (Bluetooth or WiFi) Systems
If your indoor light system supports app control, syncing may involve your phone rather than a physical remote.
Typical process:
- Power on controller.
- Enable pairing mode.
- Open app and search for device.
- Confirm connection.
- Assign room name or zone.
If using app-based control in addition to a led light remote control, pairing both devices separately may be required.
Keep in mind: WiFi-based remote control LED lights rely on stable internet and correct network credentials. Bluetooth systems require proximity during pairing.
Professional Troubleshooting Checklist
When syncing fails, experienced installers follow this order:
- Replace remote batteries.
- Confirm correct voltage supply.
- Identify signal type (IR vs RF).
- Reset controller.
- Isolate single zone.
- Attempt pairing within exact timing window.
- Test with known compatible remote (if available).
Only after these steps should hardware replacement be considered.
In most residential cases, successful pairing restores full functionality without replacing the LED strip itself.
Does Any Remote Work for LED Lights?
Short answer: no.
Many homeowners assume any led light remote control will operate any LED strip. It won’t.
Why Universal Compatibility Is a Myth
Each controller uses:
- Specific RF frequency
- Unique coding protocol
- Different channel configuration
Even two similar-looking led strip lights with remote may not share compatibility.
When Universal Remotes Can Work
If frequency and protocol match, sometimes yes. But it’s rare.
Always check controller specifications before buying replacement remotes for remote control LED lights.
How to Identify the Correct Replacement Remote
Look for:
- Controller model number
- Voltage rating
- Frequency rating (e.g., 433MHz RF)
- IR vs RF labeling
Matching these avoids wasted money.
Can I Use My Phone to Control My LED Lights?
Yes—if your system supports it.
Modern remote control LED lights often include WiFi or Bluetooth controllers.
WiFi & Bluetooth Smart LED Systems
App-enabled systems allow:
- Scene scheduling
- Voice assistant integration
- Remote access outside home
This upgrades a simple indoor light into a smart lighting system.
How to Connect LED Strip Lights With Remote to Your Phone
To convert led strip lights with remote to phone control:
- Confirm WiFi/Bluetooth controller
- Install corresponding app
- Enable pairing mode
- Connect via network
If your current controller is IR-only, you’ll need to replace it.
Advantages of Phone Control
- No lost remote
- Zone grouping
- Automation routines
- Energy tracking (in advanced systems)
Limitations of Smart LED Systems
Despite convenience, there are drawbacks.
What Are the Disadvantages of Smart LED Lighting?
Smart features have transformed remote control LED lights from simple color-changing strips into network-connected indoor light systems. You can control brightness from your phone, automate schedules, and even integrate voice commands.
But here’s the honest truth most marketing pages won’t tell you: smart LED lighting isn’t always the right solution for every home.
If you’re deciding between traditional led lights with remote and app-enabled systems, you need to understand the trade-offs clearly. Below is a practical, field-based breakdown of the real disadvantages of smart LED lighting — not theory, but what homeowners and installers actually experience.
- Higher Upfront Cost
The first and most obvious drawback is price.
Basic remote control LED lights that use RF or IR remotes are typically far more affordable than WiFi-enabled systems. Once you add:
- Network-capable controllers
- App integration
- Voice control modules
- Multi-zone hubs
The cost increases significantly.
For small installations — like under-cabinet lighting or a single bedroom strip — a simple led strip lights with remote setup often makes more financial sense.
Professionals typically recommend smart systems only when automation or remote access is truly needed.
- Internet and Network Dependence
Traditional led light remote control systems work regardless of internet connection. Smart LED lighting does not.
If your WiFi goes down:
- App control may stop functioning
- Voice commands may fail
- Remote access outside the home becomes impossible
In some cases, even local control can lag if the controller relies on cloud-based authentication.
For homeowners who prioritize reliability, simple RF-based remote control LED lights are often more dependable than network-dependent systems.
- Setup Complexity and Learning Curve
Plug-in led lights with remote are straightforward:
- Connect power.
- Pair remote.
- Done.
Smart LED lighting requires:
- Downloading apps
- Creating user accounts
- Connecting to 2.4GHz networks
- Firmware updates
- Permission settings
For tech-savvy users, this is manageable. For others, it becomes frustrating quickly.
Electricians frequently report service calls that are not wiring-related at all — but app configuration issues.
- Software and Firmware Instability
Unlike basic remote control LED lights, smart systems rely on software.
This introduces new risks:
- App updates that change interface layout
- Firmware bugs after system upgrades
- Temporary outages due to server maintenance
If the software fails, your indoor light system may behave unpredictably.
With traditional led strip lights with remote, there are no updates — which often translates to long-term stability.
- Privacy and Security Concerns
Any device connected to your WiFi network becomes part of your digital ecosystem.
Smart LED lighting systems:
- Connect to home networks
- Store configuration data
- Sometimes communicate with cloud servers
While risks are generally low, cybersecurity experts consistently advise limiting unnecessary connected devices.
If your lighting does not require remote access outside the home, a non-networked remote control LED lights setup reduces exposure.
- Increased Points of Failure
Traditional led light remote control systems rely on:
- Remote
- Controller
- Power supply
- LED strip
Smart systems add:
- Router
- App
- Firmware
- Internet service
- Cloud servers
Each additional layer increases potential failure points.
When homeowners search “why is my LED lights remote not working,” smart systems add extra troubleshooting steps:
- Is the router online?
- Is the device still connected to WiFi?
- Has the IP address changed?
- Did the app update?
Sometimes simplicity wins.
- Compatibility Limitations
Not all smart controllers work seamlessly with all existing led strip lights with remote setups.
If you want to upgrade an older system:
- Voltage compatibility must match
- Channel configuration must align (RGB vs RGBW)
- Current capacity must be sufficient
Retrofitting smart control can require replacing the controller entirely — which adds cost and effort.
This is why many installers recommend choosing your control type before installing permanent indoor light wiring.
- Latency and Response Delay
One subtle but noticeable disadvantage of smart LED lighting is response delay.
Traditional RF-based remote control LED lights respond almost instantly.
Smart systems may experience:
- 1–3 second delay after pressing a button in the app
- Slight lag in brightness adjustment
- Occasional connection timeout
While minor, these delays can be frustrating in everyday use.
- Power Outage Recovery Issues
After a power outage:
- Some smart LED systems reset to default mode
- Network reconnection may take several minutes
- Automation schedules may require reconfiguration
In contrast, most simple led lights with remote resume normal operation immediately once power is restored.
For homes in areas prone to outages, this difference matters.
- Overengineering for Simple Applications
If you only need:
- Dimming
- Basic color change
- On/off control
Then a simple remote control LED lights system is usually more practical.
Smart lighting makes the most sense when:
- You want automated schedules
- You need remote control while traveling
- You integrate multiple indoor light zones
- You use voice assistants frequently
For a single kitchen strip or bedroom accent light, adding WiFi may be unnecessary complexity.
Practical Comparison: Smart vs Traditional Remote Control LED Lights
| Feature | Traditional Remote | Smart WiFi System |
|---|---|---|
| Works Without Internet | Yes | Sometimes |
| Setup Complexity | Low | Moderate–High |
| Response Speed | Instant | Slight Delay Possible |
| Cybersecurity Risk | Minimal | Present |
| Automation | Limited | Advanced |
| Cost | Lower | Higher |
Both systems qualify as remote control LED lights, but their user experience differs significantly.
Why Is My LED Lights Remote Not Working?
If you’re searching “why is my LED lights remote not working,” you’re not alone.
Here’s the diagnostic checklist.
Dead or Weak Batteries
Replace batteries first. Always.
Weak batteries transmit partial signals.
IR Signal Blocked
If using IR, ensure line-of-sight.
Cabinets or trim can block signal.
Controller Not Receiving Signal
Test with:
- Different remote
- Closer distance
- Reset procedure
Frequency Mismatch
If you replaced your controller but kept old remote, pairing may fail.
Remote Damage or Internal Failure
Dropped remotes often break solder joints internally.
Step-by-Step Troubleshooting Checklist
- Replace batteries
- Confirm line-of-sight
- Re-pair remote
- Reset controller
- Verify compatibility
Most remote control LED lights issues resolve by step three.
What Do I Do If I Lost the Remote for My LED Lights?
This happens constantly.
Option 1 – Buy an Identical Replacement
Match controller model exactly.
Option 2 – Replace the Controller & Remote Kit
Often cheaper and easier.
Option 3 – Upgrade to Smart WiFi Controller
Convert existing led strip lights with remote into app-controlled lighting.
Emergency Temporary Solutions
If remote is lost:
- Use manual wall switch
- Install inline dimmer (if compatible)
This is a common solution discussed by electricians when homeowners lose remotes.
Choosing the Right LED Strip Lights With Remote for Your Indoor Light Setup
If you’re buying new remote control LED lights, choose wisely.
Brightness & Lumens
Under-cabinet: 300–500 lumens per meter
Ambient lighting: 150–300 lumens
Color Rendering & RGB Options
Look for CRI 80+ minimum for indoor light.
Controller Quality & Signal Stability
Cheap controllers fail more often than strips.
Safety Certifications
Ensure power supply meets U.S. safety standards.
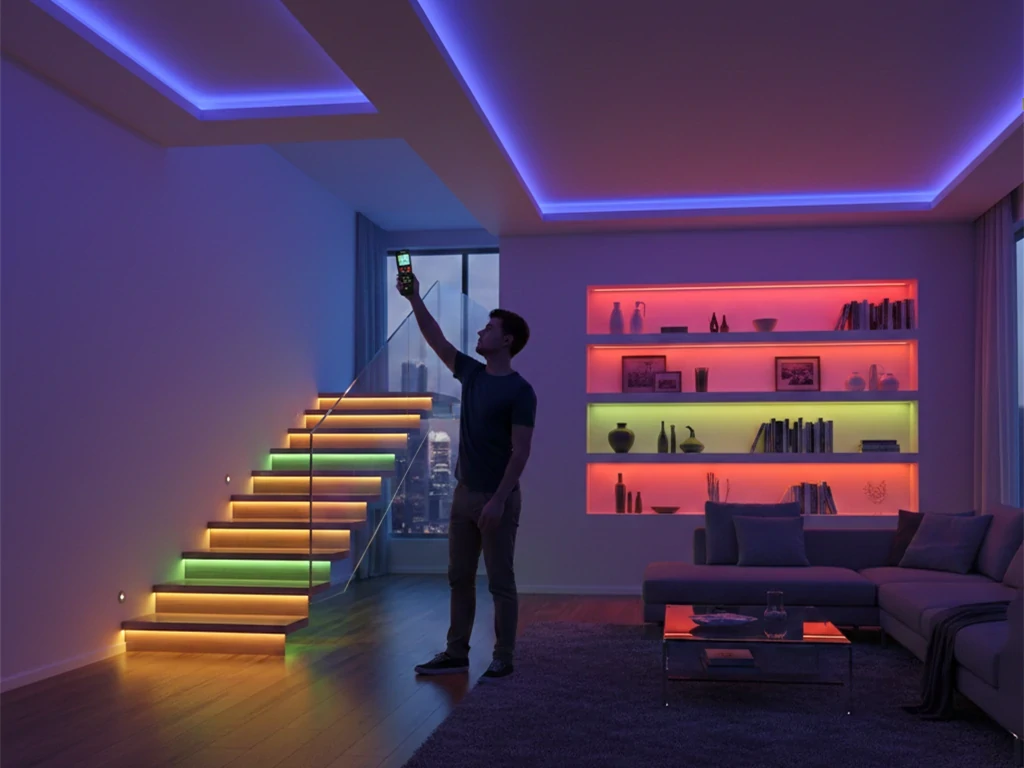
Indoor Light Application Examples
- Bedroom cove lighting
- Kitchen under cabinets
- Living room accent
- Home theater
- Gaming desk
Each application benefits differently from remote control LED lights.
Expert Tips to Avoid Remote Control LED Light Problems
After years of installation experience, here’s what prevents problems:
Buy Controller + Remote as a Matched Set
Avoid mixing brands.
Avoid Mixing Frequencies
IR and RF are not interchangeable.
Keep Sensors Visible (For IR Systems)
Tiny obstruction = no signal.
Use Stable Power Supplies
Cheap supplies cause flickering.
Label Your Controllers
Especially in multi-zone homes.
Final Thoughts – Building a Reliable Remote-Controlled Indoor Light System
If you want dependable remote control LED lights, remember:
- Match controller and remote precisely
- Understand your signal type
- Use proper power supply
- Don’t bury controllers
- Consider smart upgrades carefully
Whether you’re installing simple led strip lights with remote under cabinets or upgrading an entire home’s indoor light system, understanding how these systems work empowers you to fix problems confidently.
Lighting should work for you—not against you.
Frequently Asked Questions
Why is my LED lights remote not working?
If your led light remote control is not responding, check the following in order:
1. Replace the remote battery.
2. Confirm the controller is powered on.
3. Make sure there is no obstruction (for IR remotes).
4. Re-pair the remote to the controller.
5. Verify the power supply voltage matches the LED strip requirements.
In most cases, battery failure or pairing loss is the issue. RF remotes typically work through walls, while IR remotes require direct line of sight.
How do I reset remote control LED lights?
Resetting remote control LED lights usually involves one of these methods:
• Turn the power off for 10–15 seconds, then turn it back on.
• Press and hold the pairing or reset button on the controller.
• Quickly switch power on and off multiple times (commonly 3–5 times).
After resetting, re-sync the remote following the pairing instructions provided with your controller.
Always confirm whether your system uses RF, IR, or WiFi before attempting reset procedures.
Can I use one remote for multiple LED strips?
Yes, but it depends on the controller type.
• Single-channel controllers allow multiple strips connected in parallel to be controlled together.
• Multi-zone remotes can control different LED strips independently.
• Standard IR remotes may control all strips within range if they share the same frequency.
For large indoor light setups, multi-zone RF control is typically more flexible than basic IR systems.
What is the difference between IR and RF LED remotes?
Understanding this difference helps avoid control issues:
IR (Infrared) Remotes
• Require direct line of sight.
• Lower cost.
• Limited range.
• Can be blocked by furniture.
RF (Radio Frequency) Remotes
• Work through walls and cabinets.
• Longer control distance.
• More stable signal.
• Slightly higher cost.
For hidden controllers (inside cabinets or ceilings), RF-based remote control LED lights are usually more reliable.
Do remote control LED lights work without WiFi?
Yes.
Traditional led lights with remote that use IR or RF do not require internet access. They function independently of your home network.
Only smart WiFi-enabled systems rely on internet connectivity for app and remote access features.
If reliability during outages is important, non-WiFi systems are generally more dependable.
Why are my LED strip lights flickering?
Flickering is usually caused by:
• Incompatible power supply
• Insufficient wattage capacity
• Loose wire connections
• Overloaded controller
• Voltage drop in long LED strip runs
Ensure the power supply provides at least 20% more wattage than the total LED strip requirement. For longer runs, consider using power injection to stabilize brightness.
Flickering is rarely caused by the remote itself.
Can I control LED lights from my phone?
Only if your system supports smart control.
Standard remote control LED lights with IR or RF remotes cannot be controlled by phone unless you replace the controller with a WiFi-enabled version.
Before upgrading, verify:
• Voltage compatibility (12V or 24V)
• Channel type (single color, RGB, RGBW)
• Current rating of the controller
Incorrect upgrades can damage the LED strip.
How far can a LED remote control work?
Control range depends on the signal type:
• IR: 5–10 meters (line of sight required)
• RF: 15–30 meters (can pass through walls)
• WiFi: Depends on router coverage
Environmental interference, thick walls, and metal surfaces can reduce range.
For larger indoor light installations, RF is generally the most practical option.
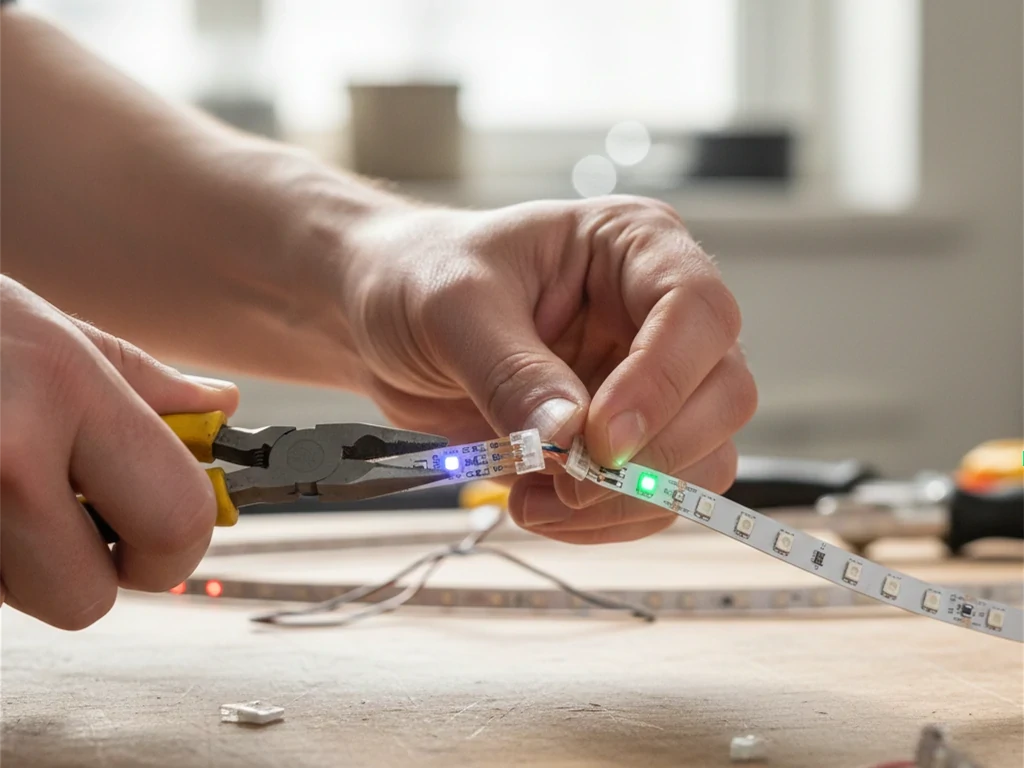
Can I cut LED strip lights and still use the remote?
Yes — as long as you cut along the designated cutting marks.
After cutting:
• Reconnect using compatible connectors.
• Maintain correct polarity.
• Ensure secure contact points.
The remote communicates with the controller, not the strip directly. As long as the controller remains properly connected, cutting the strip will not affect remote functionality.
What should I check before buying remote control LED lights?
Before purchasing, confirm:
• Voltage (12V or 24V)
• Power supply capacity
• Controller type (IR, RF, or WiFi)
• LED strip type (single color, RGB, RGBW)
• Total installation length
• Indoor or outdoor use rating
Matching components correctly prevents most installation problems.
Professionally planned setups reduce long-term troubleshooting and ensure stable performance.